How to Make an Anime Character with AI
Three steps from photo or idea to a reusable character you can use anywhere
Making an anime character used to require years of drawing practice or a commission from a professional artist. With AutoWeeb, it comes down to three steps: get a reference image, build a character sheet, and use that character in any scene or video you want.
Step 1: Start with a Reference Image
Every character starts with a visual reference. You have two ways to get one.
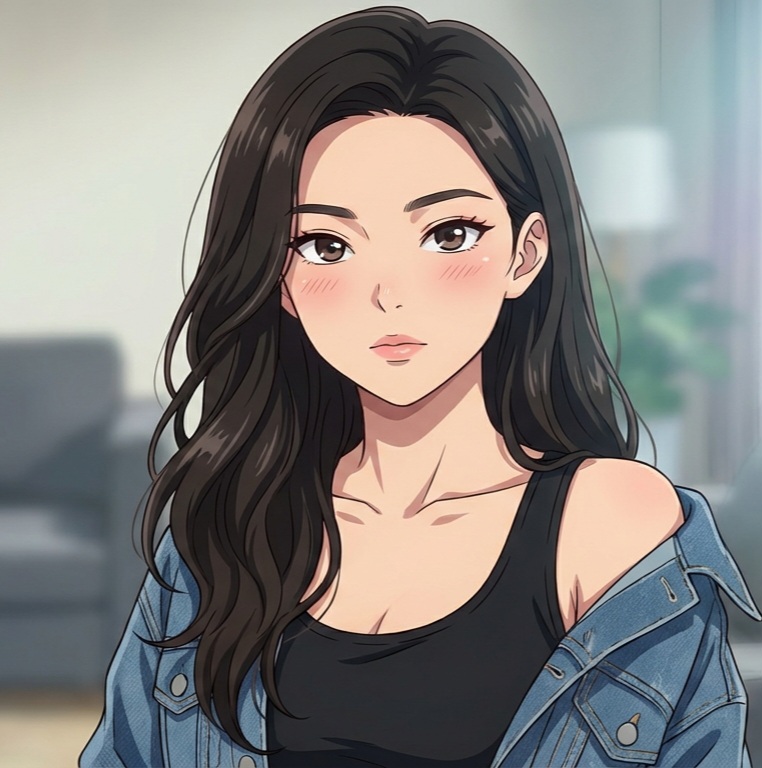
Convert a Photo to Anime
Upload a photo of yourself, a friend, or anyone you want to base the character on. AutoWeeb's photo-to-anime engine converts it into a clean anime portrait while keeping the face recognizable. The bone structure, eye shape, and hair silhouette all carry through into the anime version. The result looks like that specific person, not a generic AI face.
This is the fastest way to make an anime character that genuinely feels tied to a real person.
👉 Try the Photo-to-Anime Converter on AutoWeebUse an Existing Anime Image
Already have an anime image you love? Use it directly as your starting point. You can also browse AutoWeeb's Shared Characters library for fully realized character designs built by the AutoWeeb team. Pick one that fits your vision, or use it as a jumping-off point for something entirely your own.
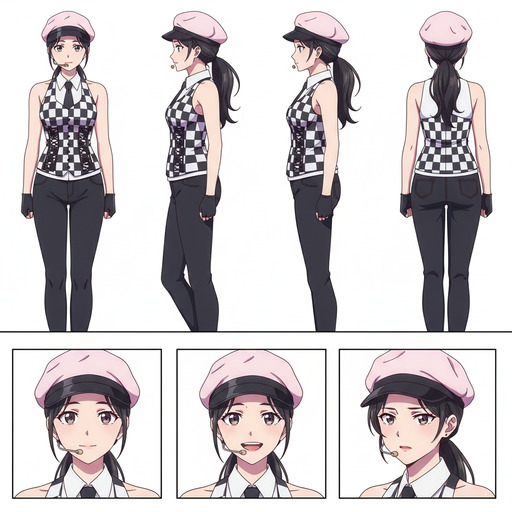
Step 2: Build the Character Sheet
A single portrait is just a starting point. To make an anime character you can actually reuse, you need a Character Sheet. It locks in the design so your character looks the same across every scene you generate.
Head to AutoWeeb's character creator and use your reference image as the base. From there, you define the details that make the character feel designed rather than randomly generated.
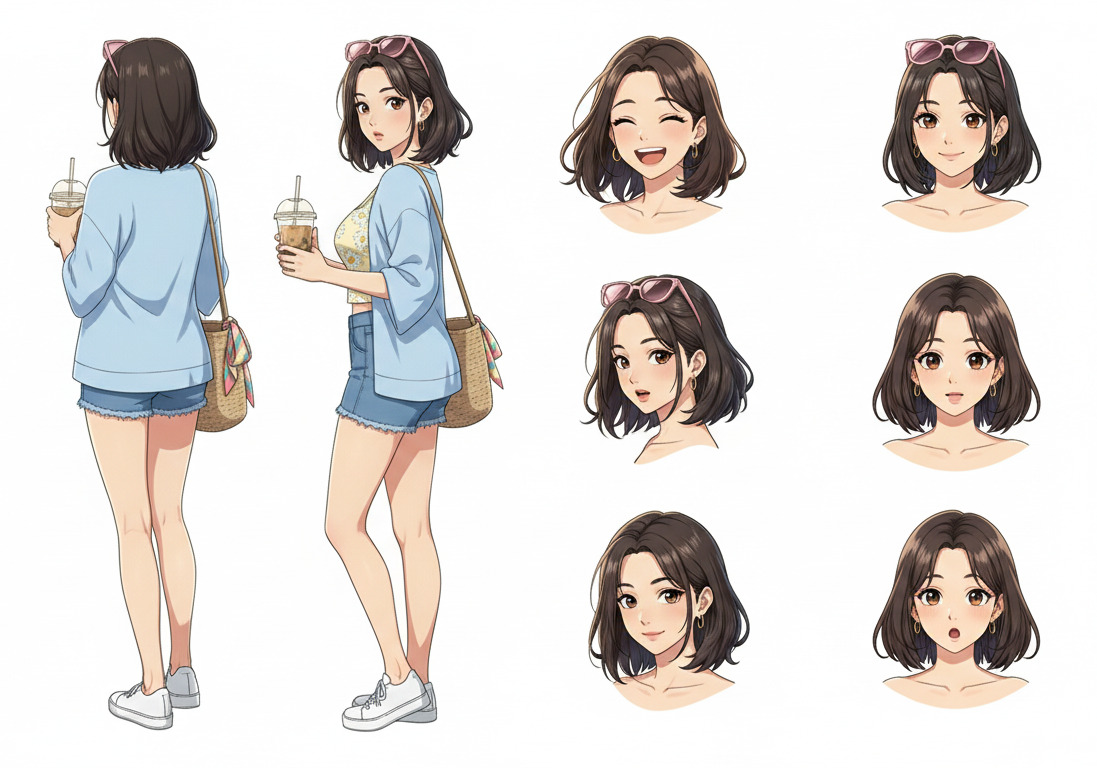
Add Clothing and Visual Details
Describe the outfit, color palette, and any signature accessories. A navy school uniform with a red pin. A weathered leather jacket. A mage robe with gold trim. These details are baked into the Character Sheet and carry through into every image you generate.
Be specific with colors. Pick two or three dominant tones and name them in your prompt. That specificity is what separates a designed character from one that looks subtly different every time.
Define the Personality
Personality shapes posture, expression, and visual energy. A calm, stoic character reads differently from a cheerful one even before they say a word. Words like "confident," "melancholy," "mischievous," or "reserved" give the model direction for how to render expressions and default poses.
Naming an archetype helps too. "Detective," "idol," "ronin," "mage" each carry a cluster of visual conventions that the model knows how to express.
Save Your Character
Once the sheet looks right, save it. Your character is now stored in AutoWeeb and available to anchor any future generation. Same face, same outfit, same vibe in every scene you drop them into.
Without a saved Character Sheet, each generation is independent and the character drifts between scenes. With one, they stay recognizably themselves no matter what situation they appear in.
Step 3: Use Your Character Anywhere
With a Character Sheet saved, your character is ready to appear in any context you can describe.
Drop into Video Templates
AutoWeeb's Explore page has ready-made templates for common scenes: school hallways, summer festivals, rooftop sunsets, action sequences, and more. Select a template, attach your Character Sheet, and generate. Your character appears in a fully composed, animated scene without any manual layout work.
Templates are the fastest way to see your character in a polished setting and a good test of whether the Character Sheet holds up visually across different environments.
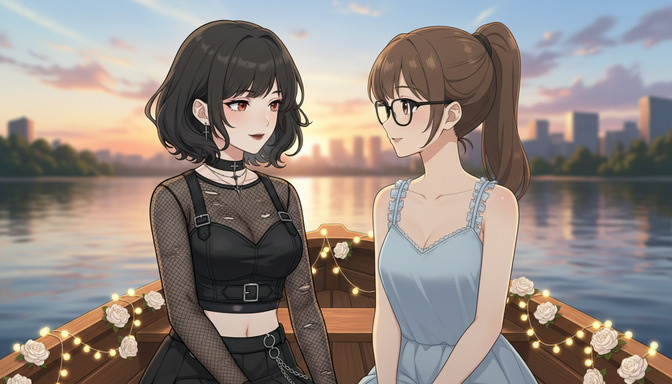
Create Your Own Images and Videos
For full creative control, write your own prompts. Describe the setting, mood, and camera angle. Let the Character Sheet handle the appearance. A good scene prompt focuses entirely on what is happening, not on re-describing the character:
"rooftop at golden hour, overlooking a quiet city street, wind moving through her hair, melancholy expression, soft rim lighting, cinematic composition"
Once you have a still image you like, animate it. AutoWeeb's video tools can add hair movement, ambient particles, and subtle expression shifts to any image. A few seconds of motion transforms a portrait into something that feels like a real scene from a series.
Once the Character Sheet is saved, the character is yours. Use them in single portraits, multi-scene sequences, animated clips, or shared directly to social. Every generation starts from the same foundation, which means every result looks like it belongs to the same series.