How to Turn an Idea into an AI Anime Video
From premise to storyboard to finished short — a step-by-step guide to transforming a raw story idea into a structured AI anime video using scene prompts, pacing, and AutoWeeb's storyboarding feature.
Most people who want to make an anime video with AI already have an idea. They know the vibe: a quiet rivalry that erupts in the rain, a coming-of-age moment set against a festival crowd, a mech pilot returning home after a mission ends badly. What they don't have is a way to get from that feeling to something that actually plays like a scene from a show. That gap is not a creativity problem. It's a structure problem, and structure is entirely learnable.
This guide walks through the full process: how to compress a rough idea into a workable premise, how to break that premise into scenes, how to write a prompt for each scene that produces cinematic results, and how to use AutoWeeb's storyboarding feature to sequence everything into a short that holds together. No drawing skills required, no video editing background, no prior experience with AI video generation.
Step 1: Compress your idea into a one-sentence premise.
An idea is not yet a premise. "I want to make a cool anime fight" is an idea. "A disgraced swordsman confronts the rival who framed him, during the final match of a tournament neither of them was supposed to reach" is a premise. The difference is stakes, characters, and a specific moment. You don't need a full story outline before you generate a single frame. You need one sentence that tells you who is in the scene, what is at stake, and what the scene is building toward.
The one-sentence premise does two things. First, it gives you a filter for every creative decision that follows — if a scene idea doesn't serve that sentence, it doesn't go in the short. Second, it determines the emotional register of every prompt you write. A short about a disgraced swordsman reads differently in every shot than a short about two childhood friends racing to see who reaches the summit first. Same mountain, same fight energy, completely different visual and tonal language.
Write your premise before you open any tool. It takes five minutes and determines the quality of everything downstream.
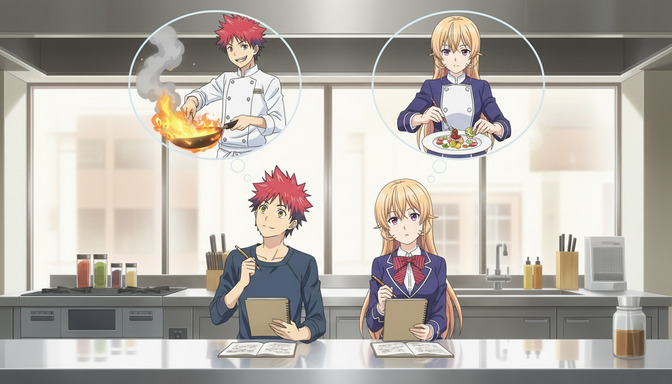
Step 2: Map your premise to three scenes.
A good anime short doesn't need eight scenes. It needs three: a setup, a turning point, and a resolution. These map directly to the classic three-beat structure that every anime episode uses at the micro level, whether it's a fight arc, a confession scene, or a quiet moment of grief. Three beats is also the natural unit that AutoWeeb's storyboarding feature is built around, and it's the length at which AI anime clips start to feel like a scene rather than a collection of pretty images.
Beat 1: Establish the world and the tension.
This is your wide shot. The establishing frame. You're telling the viewer where they are, who they're watching, and what's about to matter. For the disgraced swordsman example, this might be: the opponent steps forward into the arena, the crowd falls silent, and the protagonist's hand moves to his blade. No dialogue needed. The tension is in the geography of the frame.
Beat 2: Escalate or invert.
Something changes. The protagonist's approach fails, or works too well, or costs something unexpected. This is the scene that earns the emotional weight of the resolution. In an action short, this is the moment before the real clash. In a quiet short, it's the moment when the conversation shifts and both characters realize something has changed between them. The beat 2 shot is typically closer than beat 1: a medium shot on the character's face, a reaction, an internal moment made visible.
Beat 3: Land the emotional note.
Not necessarily a resolution in the plot sense. A landing in the emotional sense. The character's decision, expression, or action that tells the viewer what the short was about. This is often a wide shot again, but quieter and more deliberate than beat 1. For the tournament short: the protagonist lowers his blade as the opponent stumbles, neither victorious nor defeated, and the crowd is silent for a different reason than before. One image. Unmistakable meaning.
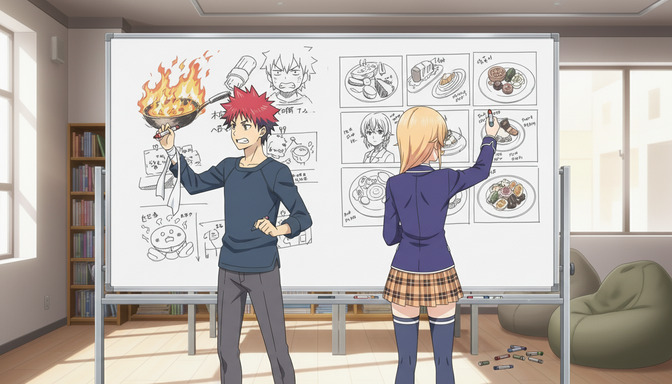
Step 3: Write one scene prompt per beat.
Each of your three beats becomes one prompt. The prompt is not a description of everything in the scene. It's a precise set of instructions for what the camera shows, how it moves, what the character is doing, and what the visual language communicates. Precision is what separates a clip that looks like what you imagined from one that looks like what the model guessed.
A prompt has five components, and all five matter: character description, action, camera direction, environment, and style or mood anchoring. Missing any one of them lets the model fill in the blank with something generic. Here is what a full scene prompt looks like for beat 1 of the tournament short:
Wide establishing shot, tournament arena at dusk, stone floor marked with old match lines, young man with close-cropped black hair and a worn gray gi stands at one end, his right hand resting on the hilt of an undrawn blade, his opponent's shadow falls long across the stone toward him, slow dolly forward, atmosphere tense and still, Demon Slayer art style, muted amber and shadow
For beat 2, closer and more internal:
Medium close-up, same young man, eyes narrowed, jaw set, a thin scar crossing his left cheek, the sound of the crowd has faded, his opponent's voice carries off-frame, slow zoom to his face, subtle energy building in his grip, Demon Slayer art style, low-key lighting, amber catching his profile
For beat 3, wide again but still:
Wide shot from behind the protagonist, he stands with his blade sheathed, his opponent kneeling in the dust ten meters ahead, the crowd is silent, cherry blossom petals drift through the frame, slow pull back, Demon Slayer art style, late dusk light, blue settling into the amber, no motion except the petals
Three prompts. One short. The common threads, same character description, same art style anchor, same arena, are what hold the three clips together visually even though they're generated separately.
AutoWeeb's video agent can build these prompts from a rougher description if you'd rather start with plain English. Describe the beat: the character, the moment, the rough mood. The agent translates it into a properly structured Seedance 2 prompt with motion language, camera choreography, and style anchoring already applied. For a closer look at how to write these prompts yourself, the guide to the best AI anime video prompt formula for cinematic results breaks down each layer in detail.
Step 4: Use pacing to control how the short feels.
Pacing in anime video is not just about how fast things move in a single clip. It's about the relationship between clips: how long each shot holds before cutting, what kind of motion each shot has, and what the contrast between adjacent shots communicates emotionally. The same three clips assembled in different orders with different internal pacing produce completely different viewing experiences.
Match motion speed to emotional temperature.
Slow motion and static holds communicate weight, grief, decision, finality. Fast cuts and dynamic camera movement communicate urgency, panic, escalating power. The establishing beat of the tournament short is a slow dolly forward — it creates anticipation, not action. The beat 2 zoom is slower still, pushing inward as the character steadies himself internally. The beat 3 pull-back holds long, which is what gives the ending its weight. If all three beats used the same camera speed, the short would feel monotone even if the story content changed.
Contrast works harder than consistency.
A quiet beat 1 makes a fast beat 2 feel explosive. A still, wide beat 3 after a tense beat 2 makes the resolution feel earned rather than flat. You're not looking for every shot to be visually interesting in isolation. You're looking for the transition between shots to create the emotional experience. That's what anime does at its best: the held pause before the charge, the cut to silence after the scream, the wide pullback that makes the last image feel like an exhale.
When you're prompting each clip, specify the motion speed explicitly. Slow dolly forward, static wide hold, fast pan left, gradual pull back. Don't let the model decide. Pacing decisions are directorial decisions, and they're yours to make. The guide to best camera movements to use in AI anime video prompts has specific prompting language for each movement type.
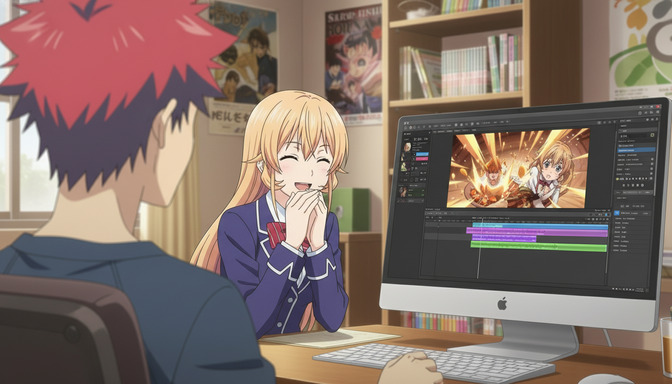
Step 5: Assemble your short in AutoWeeb's storyboarding feature.
AutoWeeb's storyboarding feature is where your three separate clips become a single, coherent short. You assign each generated clip to a position in the storyboard, add your saved character to anchor the visual identity across all three scenes, and set the output sequence. The feature handles the assembly. You handle the creative decisions.
Character consistency is the most important thing to get right in the storyboard step. If your protagonist's appearance changes between beat 1 and beat 3 because each clip regenerated the character from a text description, the short falls apart visually. AutoWeeb's character library prevents this: define your character once, either through photo-to-anime conversion or the character creator, save them to your library, and assign them to every scene in the storyboard. The same face, hair, and proportions carry through every clip without drift. If you haven't yet built a character to anchor the short, the anime character creator guide is the fastest starting point.
Once the clips are sequenced and the character is assigned, preview the assembled short. Check the transitions: does beat 1 into beat 2 feel like a cut or a jolt? Does beat 3 hold long enough to land? You can regenerate individual clips without touching the others. If the beat 2 prompt produced something that moves too fast for the slow beat 3 landing, regenerate beat 2 with a calmer camera instruction while leaving beats 1 and 3 untouched. The storyboard holds the structure while you iterate on individual elements.
The finished short is exportable directly from the storyboard view. For a three-beat short, the entire process, premise to export, typically takes one to two hours in a first session and significantly less once you're familiar with the workflow.
Frequently asked questions about turning ideas into AI anime videos.
How long does it take to make an anime short with AI?
A three-scene short, from premise to export, takes one to two hours in a first session on AutoWeeb. The most time-intensive step is writing and refining the scene prompts. Once you have prompts that consistently produce what you want, subsequent shorts in the same style take significantly less time because you can reuse the style anchoring, character reference, and camera language from earlier sessions. Most creators find that by their third or fourth short, the total time from idea to export drops to under an hour.
How many scenes does a good anime short need?
Three is the right number for a first short, and it's also the natural unit for most effective anime storytelling at short-form length. Three beats give you enough structure to tell a story with a beginning, a turning point, and a landing without overcomplicating the production. Five-scene shorts are achievable once you're comfortable with the workflow, but they require more careful pacing management and a tighter premise to prevent the middle beats from feeling like filler.
Can I use a photo of myself as the character in my anime short?
Yes. AutoWeeb's photo-to-anime feature converts a portrait photo into an anime character that preserves your facial features, hair, and proportions while applying the art style of your choice. Once converted, your character is saved in your library and available to assign to every scene in a storyboard. That saved reference is what keeps your character looking consistent across all three clips, regardless of how different the scenes are in setting, lighting, or camera angle.
What scene type is easiest to start with for a first anime short?
Quiet, atmospheric scenes produce the strongest results for first-session creators. A character standing at the edge of a rooftop at dusk, walking through a rain-soaked alley before a confrontation, sitting alone in a lit room at night while something significant happens offscreen — these work well because the motion requirements are simple, the emotional stakes are clear from the framing, and the content filters are less frequently triggered than in action sequences. Start with quiet, land the emotional note, then build toward action once you understand how the tool responds to motion descriptions.
How do I keep my character consistent across scenes in a short?
Save your character to AutoWeeb's character library before you generate any scenes. Whether you build them through the character creator or convert a photo, the saved character becomes the visual anchor for every clip you assign them to. Every scene in your storyboard that uses the saved character will reference the same appearance, without requiring you to re-enter the character description in each prompt. This is the single most important workflow step for making a short that feels cohesive rather than like three separate generations.
Do I need storyboarding experience to use AutoWeeb's storyboard feature?
No. AutoWeeb's storyboarding feature does not require you to sketch panels, know shot notation, or have any production background. You're arranging generated clips into a sequence, assigning a character, and setting the output order. The creative work is in the premise and the prompts you write for each scene. The storyboard feature handles the assembly. If you're familiar with the three-beat structure described in this guide, that's all the storyboarding knowledge you need to produce a finished short.
Which art style works best for anime shorts?
It depends on the emotional register of the premise. Demon Slayer's detailed linework and high-contrast palette suits action and confrontation. Ghibli's soft naturalism suits quiet, emotional, and coming-of-age stories. Cyberpunk's neon-edged aesthetic suits near-future, heist, and chase narratives. Slice-of-life works across a wide range of gentle, character-focused premises. The most important rule is consistency: pick one style before you write your first prompt and anchor every subsequent prompt to it. Switching styles between scenes is the fastest way to make a short feel unfinished.
What if my generated clip doesn't match what I described?
Mismatches almost always come from under-specification in one of the five prompt components: character, action, camera direction, environment, or style anchoring. Go through the prompt and identify which element is missing or too vague. If the camera is moving in a direction you didn't intend, add an explicit camera instruction. If the character's expression is wrong, describe it more precisely: jaw set, eyes narrowed, right hand tightening on the hilt rather than determined expression. Specificity is the tool. The guide to common AI anime video prompt mistakes covers the most frequent causes of mismatches with a specific fix for each one.
Can I make an anime short without any writing or story experience?
Yes. The three-beat structure in this guide requires no storytelling background — it's simply a framework for making three related images feel like a sequence. Start with a moment you want to see: a character facing something difficult, a reunion, a departure, a confrontation. Write a one-sentence premise from that moment. Map it to three shots. The framework does the narrative work; your role is making creative decisions about what each shot shows.
For deeper guidance on building story structures that translate directly into scene-by-scene prompting, the post on best AI anime story structures for beginners covers the frameworks most relevant to short-form anime video. If you're still working on the prompting side of the workflow, the full beginner-to-pro guide to AI anime video prompts has templates and examples for every scene type covered in this guide.