How to Create Multi-Character Anime Scenes Using Character Sheets
Character sheets are the difference between a cast that stays consistent across every scene and characters that look like strangers to each other.
Generating a single anime character with a consistent look is already a discipline. Generating two, three, or four characters who each hold their own identity, stand in the same frame, and still feel like they belong to the same visual world is significantly harder. The AI does not remember who your characters are between generations. It does not know that Sora has steel-gray eyes and a navy tactical vest unless you tell it every single time, in every single prompt. Without a system to carry that information, each new generation starts from scratch, and your cast slowly diverges: same name, different face.
Character sheets solve this problem. They are the reference documents that professional manga artists and animation studios have used for decades to keep every artist on the same page about what a character looks like. In an AI workflow, they serve the same function. This guide covers exactly how to build and use them.
Step 1: Understand what a character sheet actually is.
A character sheet is a standardized reference document that captures everything visually fixed about a character: their face, their build, their hair, their clothing, and their notable features from multiple angles. In professional animation, a character sheet typically includes a front view, a side profile, a three-quarter view, close-ups of the face and any key accessories, and color swatches for every element of the design.
For an AI-assisted workflow, you do not need all of that. What you need is the equivalent: a set of reference images and a written description that is specific enough to reconstruct the character faithfully across multiple generations. The reference images are your visual anchor. The written description fills in everything the images leave ambiguous, and it is what you feed directly into your prompts.
Think of a character sheet less as a formal document and more as a promise: this is who this person is, visually, and every image they appear in should honor that promise. The more specific that promise is, the more consistently the AI can keep it.
Step 2: Understand why consistency breaks down in multi-character scenes.
When you generate a single character, the AI has full compositional attention to give to that one person. When you generate two or three characters in the same scene, that attention is divided. The AI is now managing two sets of physical proportions, two color palettes, two hairstyles, and two sets of clothing simultaneously, plus the background, the lighting, and the spatial relationship between the characters.
Under those constraints, the AI makes compromises. Hair colors drift toward each other. Features blend. A character whose sheet specifies amber eyes and sun-bleached brown hair ends up with golden eyes and blond hair, because "golden" and "blond" were close enough under the generation pressure of handling two simultaneous subjects. A character who is supposed to be 10 centimeters taller than the other ends up the same height because the spatial relationship was not stated explicitly in the prompt.
Consistency in multi-character scenes requires you to do the disambiguation work that the AI cannot do on its own. That means being more specific per character in multi-character prompts than you would be in a single-character prompt, anchoring every character to their sheet before you add scene, lighting, or action, and checking each character against their reference individually before accepting the output.
Step 3: Build a reference image for each character.
The reference image is the visual half of the character sheet. Generate a clean, neutral-pose image of each character individually before you attempt any group scene. This is not optional. It is the foundation the rest of the workflow builds on.
A good reference image has several properties. The character is centered in the frame, either a bust shot or a three-quarter body shot. The background is minimal: a flat color, a gradient, or a clean interior. The lighting is even and does not cast strong directional shadows that obscure features. The expression is neutral or close to neutral: a slight natural resting expression is fine, but a dramatic expression shifts features in ways that make the reference harder to use across scenes.
The specifics of what to prompt for a clean reference:
- Front-facing or slight three-quarter angle — not a profile, not a dramatic angle
- No dramatic lighting: soft, even light that shows true hair and eye color without color-shifting shadows
- Full outfit visible from at least the waist up, with all key accessories present
- Hair down or in its default style — not wind-swept or wet or obscured
- Clean background that does not bleed color onto the character
Generate two or three variations of this reference and keep the one where the character looks most like the character you described. That image goes into a folder labeled with the character's name. It is what you upload when the generation tool accepts reference images, and it is what you look at when checking consistency after every generation.
Step 4: Write a precise character description for each character.
The written description is the text half of the character sheet, and it is the part that goes directly into every prompt that features that character. Write it once, write it specifically, and use it exactly as written every time.
A strong character description covers these elements in order:
- Hair: color, length, and style. Name the specific color. "Ash-blond" is more useful than "light hair." "Mid-length, slightly wavy, tucked behind the right ear" is more useful than "medium hair."
- Eyes: color and shape. "Steel-gray, slightly downturned at the outer corners" is better than "gray eyes."
- Build and height: relative to other characters in the scene or against a reference ("compact and lean, shorter than most of the cast").
- Clothing: every piece, in enough detail that nothing gets hallucinated. "Dark navy hooded jacket, unzipped over a white shirt, with a red strap across the chest" leaves no ambiguity for the AI to fill with invention.
- Notable features: scar, mark, accessory, weapon, unusual feature. State these explicitly because the AI may or may not include them without a direct instruction to do so.
An example of a complete character description for a single character:
Riku, male, mid-teens, ash-blond mid-length hair, slightly wavy and tucked behind the right ear, steel-gray downturned eyes, lean build with a slight forward lean to his posture, dark navy hooded jacket unzipped over a white shirt, red tactical strap across the chest, no accessories, calm and watchful expression.
That description is specific enough to reconstruct Riku reliably across different scenes, styles, and generation runs. When you prompt for a scene with two characters, you lead with the same description block for each character before you describe the scene itself.
Step 5: Maintain character appearance across different scenes.
Once the reference images and written descriptions are established, the workflow for maintaining consistency across scenes becomes a checklist rather than a guessing game. For each new scene, structure the prompt in three layers: characters first, then relationship and action, then scene and environment.
Characters first means leading every multi-character prompt with the full written description of each character who appears in that scene. Do not abbreviate. Do not assume the model remembers from the last generation. The description block is the same every time:
Character 1: [full description]. Character 2: [full description]. Scene: [both characters standing at the edge of a rooftop at dusk, Character 1 facing forward, Character 2 with their back to the viewer looking out over the city]. Lighting: warm amber sunset from the right side. Style: clean anime linework, soft shading.
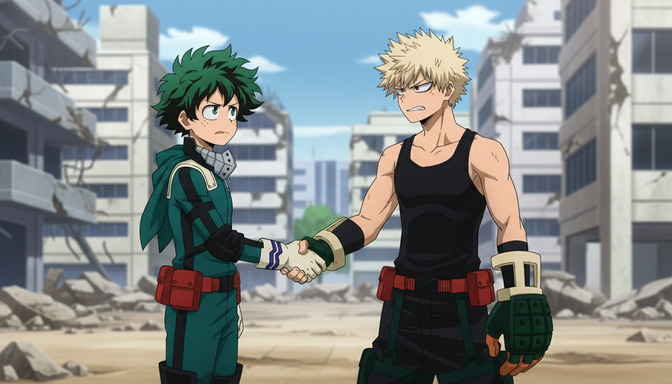
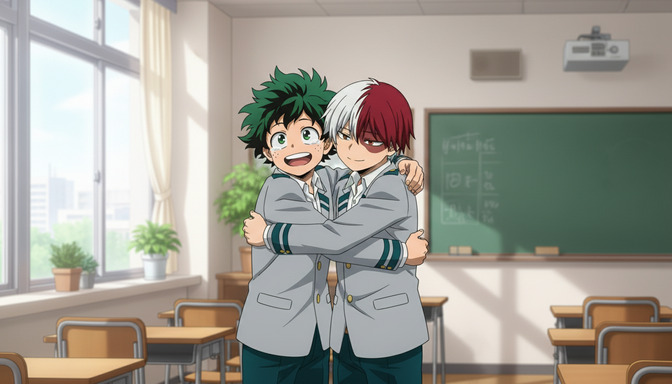
The relationship and action layer is where you describe how the characters are positioned relative to each other and what they are doing: standing side by side, one sitting while the other stands, one reaching toward the other from behind. This spatial information is what prevents the AI from defaulting to a symmetrical, awkward side-by-side arrangement every time.
If your generation tool accepts reference images, upload both character reference images alongside the written description. The visual reference anchors the color palette and feature details in a way that text alone sometimes cannot. Use both together, not one as a substitute for the other.
After each generation, check each character against their individual reference image before accepting the output. It takes less than a minute and catches the small drifts: the eye color that shifted, the jacket detail that changed, the hair that went from ash-blond to golden under the warm lighting. Small drifts, if left unchecked, compound across scenes until the character is unrecognizable by the time you reach the final panel.
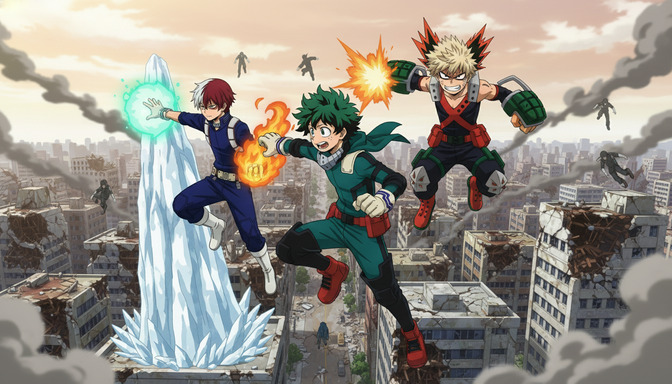
Step 6: Compose group shots that actually work.
A group shot is not just a wider version of a two-character scene. It has its own compositional challenges, and understanding them makes the difference between a coherent cast image and a confusing crowd where every character looks slightly generic.
The most important principle in a group shot is visual contrast. Each character needs a visually distinct profile so that the eye can separate them instantly. Contrast is built from three elements: hair color, outfit color, and build. If two characters have similar hair colors, they need contrasting outfit colors. If two characters have similar builds, one needs a distinctive feature that breaks the silhouette: a large weapon, a scarf, an unusual hairstyle. If three characters are all wearing dark clothing, the scene needs lighting or background contrast to separate them.
For AI generation specifically, group shots work better when you provide an explicit spatial arrangement in the prompt. "Left to right: Riku in the foreground, Sora in the middle ground, Hana in the background at a slight elevation" gives the model a compositional instruction that produces more useful results than "all three standing together." It also prevents the model from defaulting to a flat lineup where all characters are the same size and distance from the camera.
Three characters is generally the maximum for a group shot where individual consistency can be reliably maintained in a single generation. Four or more characters introduces enough simultaneous complexity that individual features begin to compress or average. For casts of four or more, consider generating sub-groups and compositing, or using the group shot for establishing purposes and relying on individual or two-character shots for any panel that requires a character to be recognizable.
Step 7: Avoid the most common mistakes in multi-character generation.
The mistakes that appear most reliably when generating multi-character anime scenes fall into a small number of patterns. Recognizing them before you start saves a lot of regeneration time.
Underdescribed characters. The most common mistake by a significant margin. "Two anime boys in a fight scene" is not a prompt with characters in it. It is a prompt for two generic anime boys. The AI fills every unspecified detail with whatever it finds statistically likely, and the result is characters with no relationship to your actual cast. Full descriptions, every time.
Characters with the same visual profile. Two characters with similar hair length and color, similar builds, and similar dark-colored outfits will merge visually under almost any generation. The AI will blur the boundary between them, produce inconsistent details across their bodies, or simplify one character's design to match the other. Build visual contrast into the character designs before you get to the generation stage.
Letting the scene dominate the character prompt. The order of elements in a prompt influences their weight in the output. A long, detailed scene description placed before brief character descriptions produces a visually impressive scene with generic characters. Characters come first, in full detail, before any scene element is introduced.
Accepting the first output without a consistency check. A generated image that looks plausible at first glance often has small inconsistencies that become obvious when checked against the character reference. Check every output before using it, not just the ones that look wrong immediately.
Neglecting relative scale. If one character is significantly taller than another, the prompt needs to say so explicitly. Without that instruction, the model defaults to matching heights because equal-height compositions are statistically more common in its training data. State height differences as a compositional fact: "Character 1 is notably taller and stands slightly behind Character 2, creating a height difference of roughly one head."
If you are building out a full story alongside your character work, the guide on generating story ideas with AI before building your anime storyboard covers how to develop the narrative framework that makes every scene purposeful. For the character design side of the workflow, the anime character creation guide goes deeper into designing individual characters before you bring them into scenes together.
Frequently asked questions about creating multi-character anime scenes.
How many characters can I reliably include in a single generated image?
Two to three characters is the practical ceiling for consistent individual character fidelity in a single generation. With two characters, you can carry nearly complete descriptions for both and achieve strong consistency with a good character sheet. With three, you need to be especially precise about visual contrast and spatial arrangement. Four or more characters in one generation will almost always involve some degree of feature compression or averaging across characters. For groups larger than three, generate in pairs or trios and composite the final image, or use the full-group generation as a loose establishing shot rather than a canonical reference.
Do I need a new character sheet for every different art style I generate in?
Not a new sheet, but you do need style-aware descriptions. Some character details translate cleanly across styles: a character with waist-length silver hair remains identifiable whether the style is shonen or slice-of-life. Other details, particularly clothing complexity and facial feature specificity, may need adjustment. A highly detailed tactical outfit described for a military-style generation may need to be simplified in a description written for a soft slice-of-life style, because the generation model for that style will approximate complex details rather than render them precisely. Test your character description in each new style with a solo reference generation before moving to multi-character scenes.
What if my characters have similar hair colors and I cannot change their designs?
Use other visual levers. Outfit contrast is the most reliable: a character with dark brown hair in a white coat reads as clearly distinct from a character with dark brown hair in a red-trimmed black jacket. Silhouette contrast works well too: a difference in build (one compact and muscular, one slim and tall), a distinctive hair accessory on one, a weapon or bag carried by one and not the other. If the hair colors are close, make everything else as visually distinct as possible, and explicitly call out the differences in the prompt rather than relying on the model to infer them.
Should I upload reference images or is the written description enough?
Both is better than either. The written description is precise and can be used in any text-based prompt field. The reference image anchors the color palette and overall aesthetic in a way that language sometimes underdetermines: the exact shade of steel gray in an eye, the specific blue-black of a jacket, the weight of a hairstyle. When the tool accepts both a reference image and a text prompt, use both. When it accepts only text, make the written description do the visual work of the image by naming specific colors, textures, and proportions rather than relying on general terms.
How do I handle characters who change outfits across scenes?
Treat each outfit as a separate character sheet variant. Keep the physical description (face, hair, build, notable features) constant and create separate outfit description blocks for each context: school uniform, casual wear, battle gear, formal outfit. When prompting, use the same physical description every time and swap only the outfit block. This keeps the core character identity anchored while allowing the costume to change as the story requires.
Why do my characters look right individually but wrong together in a group shot?
The most common cause is that the individual reference images were generated in different sessions with slightly different implicit style settings, and those differences surface when both characters must coexist in the same frame. The AI reconciles the visual conflict by averaging or compromising between the two, which shifts both characters slightly toward each other's aesthetic. The fix is to generate all character reference images in the same session, with the same style parameters, so the visual baseline is consistent before you move to group shots. If you are using AutoWeeb's anime character creator, keeping all characters within the same project ensures they share a common style foundation.
Can I use character sheets to generate the same character at different ages?
Yes, and it is one of the more powerful uses of the system. Keep the core physical description (hair color, eye color, distinctive features) as a fixed anchor and add age-specific modifiers to the build and face: "same character, late twenties, slightly sharper jaw, broader shoulders, same ash-blond hair now worn shorter, same steel-gray eyes." This produces a believable visual continuity between character versions that a prompt without the anchor would never achieve. The character sheet becomes a through-line across the full narrative arc.
Related Blog Posts
Generate Story Ideas With AI Before Building Your Anime Storyboard
The storyboard cannot tell a story the idea never finished building. Start with inspiration, not panels.
Learn how to generate AI story ideas before you storyboard. Genre-first, character-first, world-first methods with examples for romance, action, horror, and more.
How to Create a Character Arc Before Storyboarding Your Anime Story
The character arc is not something you add after the storyboard. It is the decision that makes every panel in the storyboard necessary.
Learn how to create a character arc before storyboarding your anime story. Covers positive, negative, and flat arcs, internal vs external conflict, and character wants vs needs.
How to Pick Anime Story Tropes That Make Your Storyboard More Engaging
The story tropes that do not just decorate your script — they dictate every panel order, shot distance, and emotional beat on the storyboard.
Learn how to pick anime story tropes that strengthen your storyboard. A step-by-step framework covering character tropes, writing tropes, and story ideas with AutoWeeb.
How to Write a Script With AutoWeeb's AI Story Agent
The script is not a step you skip on the way to the storyboard. It is the map that makes every panel in the storyboard necessary.
Learn how to write a script with AutoWeeb's AI story agent. Complete workflow: story idea, genre, tropes, characters, script generation, scene refinement, and storyboard panels.
Explore AutoWeeb
Jump into the tool that fits your creative step.
AI Anime Video Generator
Animate storyboard shots into cinematic clips with Seedance 2 and consistent characters.
Anime Character Creator
Design original characters with consistent sheets across every scene.
AI Anime Image Generator
Generate cinematic anime stills anchored to your character library.
Turn Photo Into Anime
Upload any photo and watch AI turn it into stunning anime art in seconds.
AI Anime Location Generator
Create a location set once, then generate reference images from every angle.
AI Anime Storyboarding
Describe your idea, pick your characters, and let AI draft the script and scenes.
AI Anime Prompt Agent
Turn a rough idea into a cinematic Seedance 2 prompt with the AI Director.