Introducing the Anime Storyboard Creator
Write your anime script and bring every scene to life with AI-generated images and videos.
The hardest part of creating an anime story is the gap between the idea in your head and a scene you can actually see. You know what you want: the characters, the forest, the magic, the tension in the moment before something happens. Getting it onto a screen used to require either drawing skill or the ability to write detailed generation prompts from scratch. AutoWeeb's new anime storyboard creator closes that gap. Tell it what you want to make, and it handles the writing. Then use the storyboard to generate images and videos for every scene.
Step 1: Tell us what you want to create.
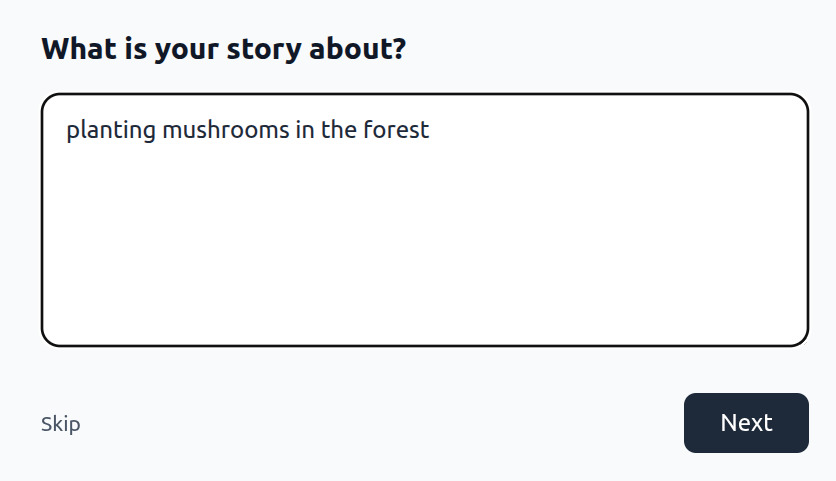
The storyboard begins with a single prompt: what is your story about? A sentence describing the scene, the characters, the situation. You don't need to think about script structure yet. "Two mages searching for a lost artifact in an enchanted forest" is enough to start. AutoWeeb reads your description and begins shaping the story around it, asking follow-up questions rather than guessing.
Step 2: Choose your characters.
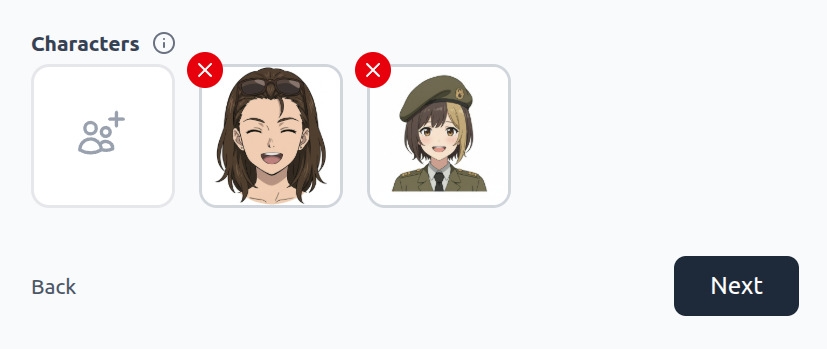
Once you've described your story, AutoWeeb asks which characters appear in it. Your saved character library is right there: any character you've designed from scratch with the anime character creator, or converted from a photo with photo to anime, appears here ready to cast. Select who's in the story and they'll carry through every generated scene consistently: same face, same outfit, same presence.
Step 3: Let AI refine your concept.
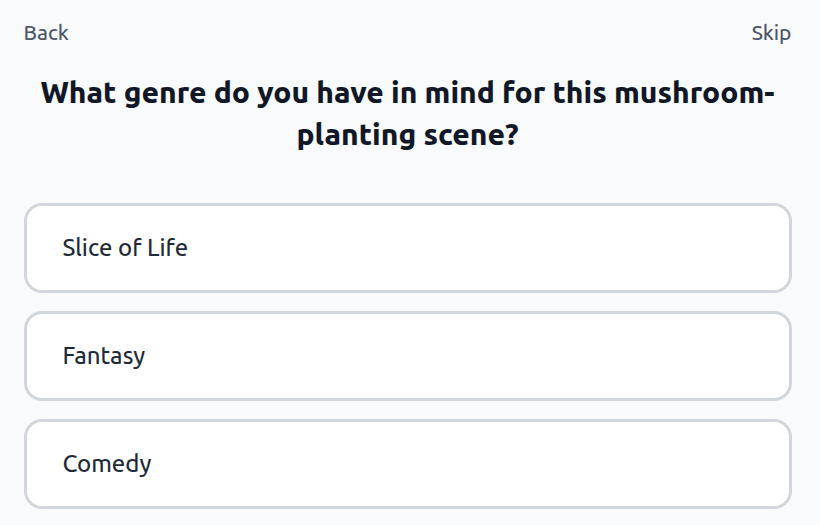
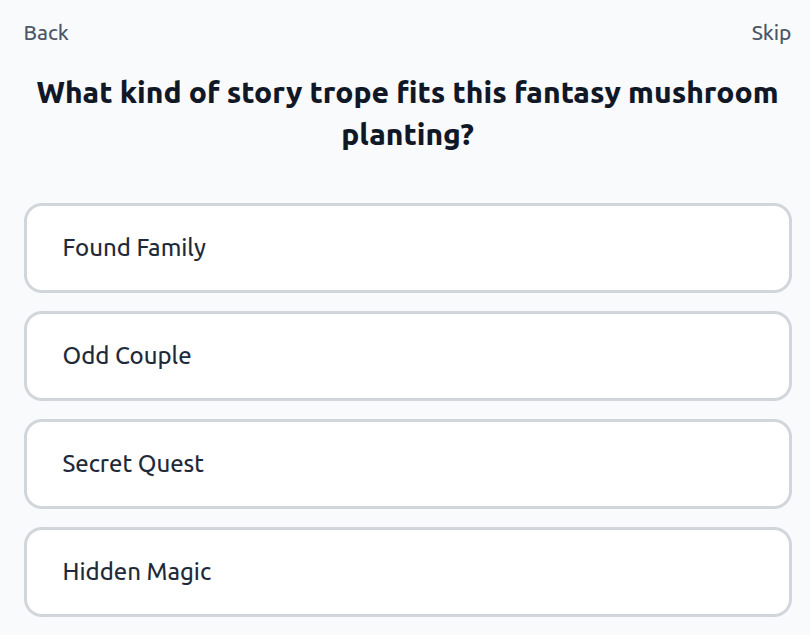
Before writing the script, AutoWeeb asks a few clarifying questions: What genre fits this story? What kind of trope is at the center of it? These aren't bureaucratic fields. They're the context that determines whether the AI writes a tense Found Family confrontation or a slow-burn Hidden Magic reveal. The questions take thirty seconds to answer, and the script they shape takes thirty seconds to generate.
Step 4: Review and edit the script.
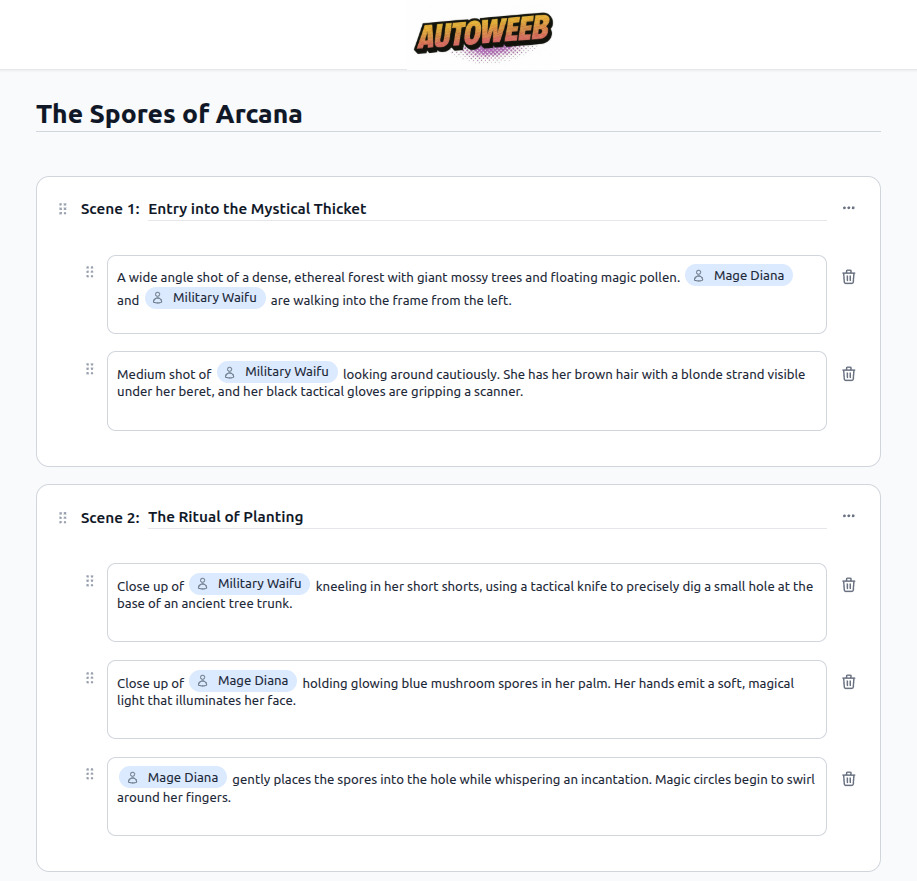
The AI writes a full scene-by-scene script: scene titles, individual shot descriptions, which characters appear in each frame, and what they're doing. It's a working draft, not a final cut. You own every line. Add a shot, rewrite a description, cut a scene entirely, or leave it exactly as written. The script is the plan; the storyboard is where it becomes visual.
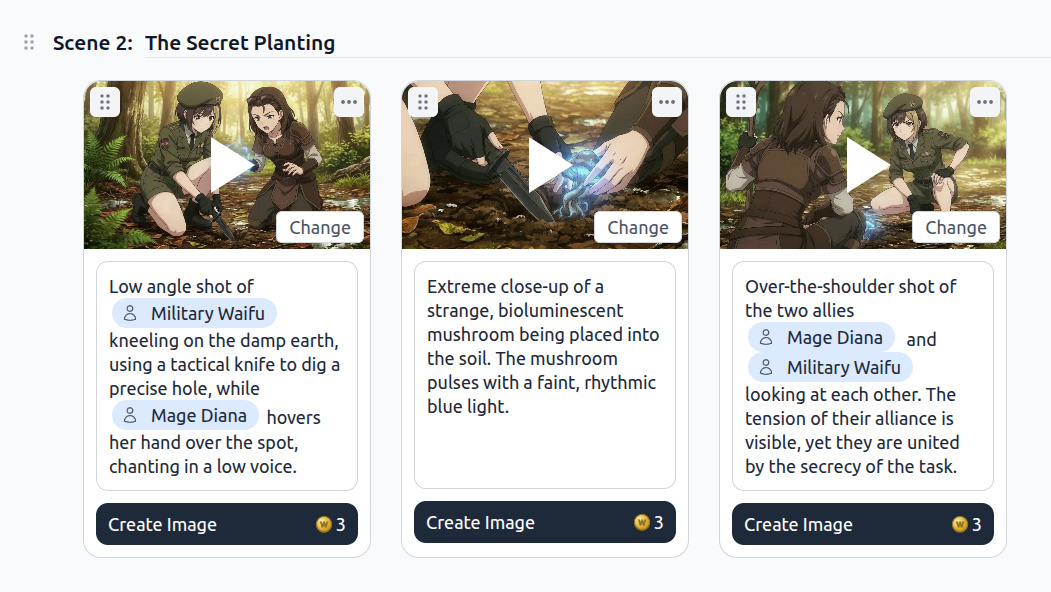
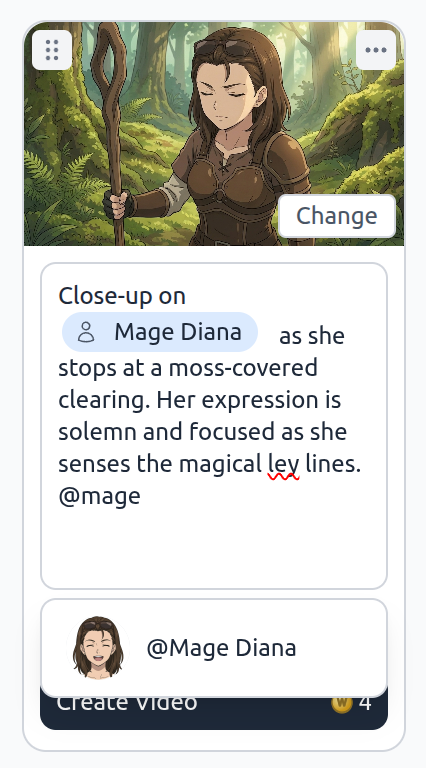
Step 5: Generate images and videos for every scene.
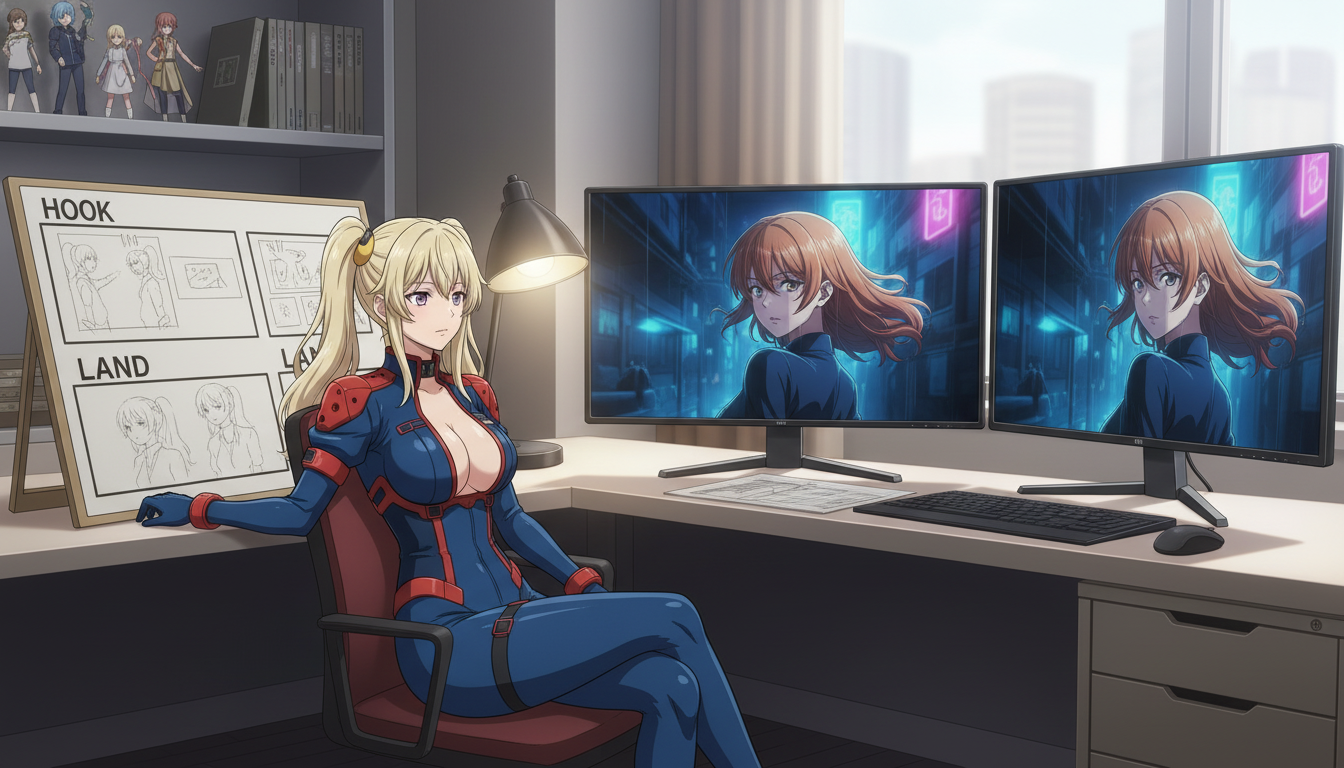
When you're ready to go visual, the storyboard becomes a generation workspace. Each shot from the script is laid out as a card with its prompt text pre-filled from what the AI wrote. Hit "Create Image" or "Create Video" on any shot and AutoWeeb generates it. The model looks at other images already generated in the same scene, which means lighting, color palette, and character rendering stay consistent across shots even if the angles and poses change. A wide establishing shot and a close-up of the same character will look like they're in the same anime because they're informed by each other.
This is the part of the storyboard workflow that takes a script from structured text to something you can actually watch. For action-heavy or motion-dependent scenes, choosing video generation gives you the full Seedance output: camera movement, character motion, environmental details. For quieter moments where a still communicates everything, image generation is faster and more precise.
Step 6: Edit prompts and tag more characters.
Every prompt in the storyboard is editable. Rewrite the shot description, adjust the camera angle, change what a character is doing. And if a shot needs a character that wasn't in the original script, type @ in the prompt field to search your AutoWeeb character library and tag them directly. The character's reference is attached to that specific shot without affecting the rest of the storyboard. You can regenerate that single shot and see the updated result without touching anything around it.
This granular control is what makes the storyboard useful for longer stories. Each shot is independent: edit and regenerate one without resetting the work you've done on the others.
Frequently Asked Questions
How do I access the storyboard feature in AutoWeeb?
Once you're logged into AutoWeeb, look for the Storyboard option in the creation menu. The wizard launches immediately and walks you through describing your story, selecting characters, and reviewing AI-generated genre and trope suggestions before writing your script.
Can the storyboard handle multi-character scenes?
Yes. When writing prompts for each shot, you can tag multiple characters from your AutoWeeb library using the @ mention. AutoWeeb will reference all tagged characters when generating the image or video for that shot, maintaining consistent appearances for each one.
What genres work with the storyboard wizard?
The wizard surfaces common anime genres including Slice of Life, Fantasy, Action, Romance, and Comedy, but you're not limited to those. Any genre you describe in text can shape the script. AutoWeeb's AI adapts the scene structure, tone, and story tropes based on what you choose.
Can I regenerate individual shots without redoing the whole storyboard?
Yes. Every shot in the AutoWeeb storyboard is independent. Edit the prompt text or click to regenerate a specific image or video without affecting the surrounding shots. The "Change" button on each shot lets you swap out any generation that isn't quite right.
How does AutoWeeb keep characters consistent across scenes?
AutoWeeb anchors every generated shot to your saved character references. Beyond that, when generating within a scene, AutoWeeb studies other images already generated in that scene to align lighting, color palette, and visual style. The result is a storyboard where shots from different moments in the same scene look like they belong to the same episode.
If you're building a story with multiple episodes or planning to create videos from your scenes, the storyboarding pre-production guide for video creators walks through how to annotate panels before you generate. And if your characters don't exist yet, start with the anime character creation guide before you open the storyboard wizard.
Related Blog Posts
AI Anime Land Beats and Cliffhangers for YouTube Shorts
The last three seconds earn the next upload. Storyboard the land, generate one hold, and end on a question viewers cannot scroll past.
Design AI anime land beats and cliffhanger endings for YouTube Shorts: payoff panels, one-action holds, honest thumbnails, and prompts that lock your saved OC before EP02.
AI Anime Turn Beats for YouTube Shorts
The middle seconds deepen the hook without stealing the land. Storyboard one escalation, generate one action, and hand off to the cliffhanger on purpose.
Design AI anime turn beats for YouTube Shorts: middle-beat storyboard rows, one-action escalation prompts, b-roll handoffs, and saved OC locks before the land hold.
Creating an Anime Series with AI in 2026
A single-cour production grid for YouTube creators: twelve beats, one locked protagonist, and a still-to-motion chain that ships like a show.
Creating an anime series with AI in 2026 means a twelve-episode grid, locked protagonists, and Shorts-ready motion. A production workflow for YouTube video creators.

How to Build an AI Anime Episode Backlog for YouTube Creators
Launch week is editing time, not panic-generating time. Six finished cells in reserve change how your cour feels on day zero.
Build an AI anime episode backlog before YouTube launch week: spreadsheet rows, batch stills, motion QA, and reserve Shorts so you publish on schedule without drift.
Explore AutoWeeb
Jump into the tool that fits your creative step.
AI Anime Video Generator
Animate storyboard shots into cinematic clips with Seedance 2 and consistent characters.
Anime Character Creator
Design original characters with consistent sheets across every scene.
AI Anime Image Generator
Generate cinematic anime stills anchored to your character library.
Turn Photo Into Anime
Upload any photo and watch AI turn it into stunning anime art in seconds.
AI Anime Location Generator
Create a location set once, then generate reference images from every angle.
AI Anime Storyboarding
Describe your idea, pick your characters, and let AI draft the script and scenes.
AI Anime Prompt Agent
Turn a rough idea into a cinematic Seedance 2 prompt with the AI Director.