Best AI Tool to Create Anime Videos from Your Photos
One photo gives you a saved character you can restyle, place in new scenes, and animate into videos — all without starting over each time.

Most AI tools that promise photo-to-anime conversion stop at the image. You upload a photo, get an anime portrait back, and that's the product. There's no character to save, no way to change the outfit for a different scene, no path to building a video. If you want to use that character again next time, you're uploading the photo again and hoping the output is close enough.
AutoWeeb is built around a different model. Your photo becomes a saved character in a library, and that character persists across every image and video you create. You can update their outfit, adjust their hair color, change their accessories, and they'll carry those updates into every new scene you generate. Converting a photo to anime is the beginning of the workflow, not the end of it.
👉 Start Free on AutoWeeb — Turn Your Photo Into an Anime Character TodayStep 1: Convert your photo to an anime character.
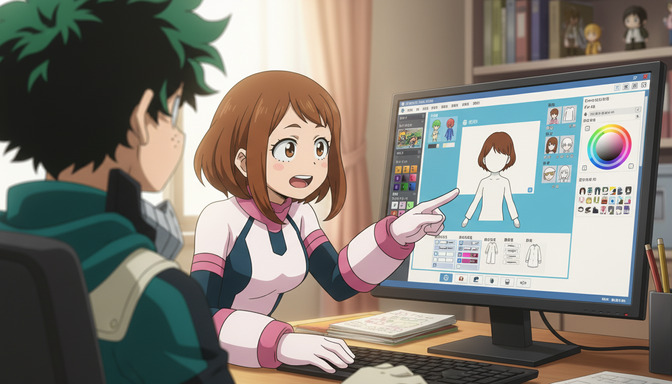
What the conversion actually does.
Upload a clear, front-facing photo and AutoWeeb converts it into a fully realized anime character. The system reads your facial structure, hair shape, skin tone, and prominent features, then rebuilds them in the visual language of whichever anime art style you select. The output isn't a filter applied on top of your photo. It's a generated anime character that shares your proportions and likeness.
The best photo for conversion is a portrait with even lighting and your face unobstructed. Front-facing selfies taken in natural daylight or well-lit indoor settings consistently produce strong results. Heavy filters, dark shadows across the face, and accessories that cover key facial structure reduce fidelity. For most people, a clean smartphone selfie is all that's needed.
Choosing your art style before or after conversion.
You select your anime art style as part of the conversion step, but the choice isn't permanent. AutoWeeb offers more than a dozen named styles, each with distinct visual characteristics: Demon Slayer's sharp linework and high-contrast lighting, Ghibli's soft naturalism, Spy x Family's clean expressive rendering, Cyberpunk's electric palette and neon edges. The style you pick shapes how the character looks in every scene they appear in.
If you're not sure which to choose, start with the style from a show whose visual aesthetic already resonates with you. You can always re-render your saved character in a different style later without re-uploading the original photo. The full range of available styles and their visual outputs is on the AutoWeeb styles page.
Step 2: Save your character and customize their details.
Your character library is the center of everything.
Once AutoWeeb converts your photo, the resulting anime character is saved to your character library. That save is what separates this tool from a one-shot converter. Your character now has a persistent identity: the system knows what they look like, and every image and video you generate from that point on can call that character back without you re-describing them from scratch.
From the character editor, you can update any aspect of their appearance. Change their outfit to a school uniform, a military jacket, a summer dress, or a training gi. Adjust hair color from their natural shade to silver, deep violet, or bleached platinum. Add accessories: a scar, a pair of wire-frame glasses, a headband, a distinctive tattoo. Each update is applied to the saved character and carries forward automatically into every new generation that references them.
Building character variations for different scenes.
The outfit and detail system makes it practical to build character variations without creating separate characters. A saved character can appear in a school scene wearing a uniform, in an action sequence wearing tactical gear, and in a festival scene in a yukata, and all three versions are recognizably the same person. The core facial identity from your original photo stays constant; the styling changes with the context.
This matters most when you're building a series of images or a multi-scene video. Narrative consistency is what makes a set of images feel like an actual story rather than a collection of unrelated portraits. Saving your character once and updating their outfit per scene is the fastest way to achieve that consistency without manual illustration work.
Step 3: Use your saved character in new images and scenes.
Placing your character in any scene you can describe.
With your character saved, generating a new image means describing the scene, not the person in it. AutoWeeb's image generation takes a text description of the setting, mood, and action and places your saved character into that environment in whatever outfit and style configuration you've set. The character doesn't have to be re-described; they're already defined.
Prompt descriptions like these give the tool enough to work with:
- My character standing at the entrance of a Tokyo convenience store at 2am, holding an onigiri, warm fluorescent light spilling onto the wet sidewalk
- My character seated at a wooden desk in a sunlit library, surrounded by open books, afternoon light coming through tall windows
- My character in a festival yukata, standing under a row of paper lanterns, holding a goldfish scoop, looking slightly embarrassed
AutoWeeb's photo packs offer curated pre-built scene environments that your saved character can drop into directly: city streets, festival grounds, school hallways, forest paths, beachside towns. Using a photo pack background with your saved character is the fastest way to generate polished, scene-consistent images without needing to generate or describe a background yourself.
Building a set of images that tell a story.
Individual scenes become a visual narrative when they share a character and a through-line. Three or four images with your character across a single day, an arrival scene, a quiet midpoint, a moment of resolution, have the structural beats of a short story. AutoWeeb's story planning tools help you define that arc before you start generating, so the scenes you build have narrative purpose rather than being isolated portraits.
For a deeper look at using images and scenes together as storytelling units, the guide to the best AI tool for anime storytelling covers how to structure those arcs and what scene types anchor them most effectively.
Step 4: Turn your images and scenes into anime videos.
How the video agent works with your saved character.
AutoWeeb's video agent is what makes the step from image to video accessible without prompting expertise. You describe the scene you want animated in plain English, and the agent converts that description into a structured Seedance 2 video prompt with camera direction, motion language, pacing, and style anchoring built in. Your saved character is already referenced; you're just directing the scene.
Descriptions like these give the agent what it needs:
- My character walks slowly down a narrow alley at dusk, hands in pockets, passing glowing izakaya signs, camera tracking alongside them
- My character leans against a railing on a train platform, watching the train pull away, wind lifting their hair, slow push-in from behind
- My character opens a door and steps into a sunlit forest clearing, looks up at the canopy, soft orchestral build in the background
The agent translates each of these into a complete prompt. You review it, adjust if needed, and generate. First clips are typically three to five seconds — enough to evaluate character rendering, verify the style is right, and confirm the motion matches the scene you described. Iteration is fast. If something is off, adjust the scene description and regenerate.
What scenes animate best from photo-sourced characters.
Atmospheric motion scenes produce the most consistently strong results when starting from a photo-sourced character: walking, standing in wind, reacting to something in the environment, a slow camera push-in on a quiet moment. These have clear visual anchors, simple motion requirements, and let the character's face hold the frame long enough to read well.
High-intensity action sequences are possible, but they're more complex and benefit from experience with how the tool responds to your descriptions. Building toward action after you've generated a few quieter scenes is the more efficient path. By the time you're ready for a fight sequence or a dramatic confrontation, you'll know exactly how to describe the motion to get the result you want.
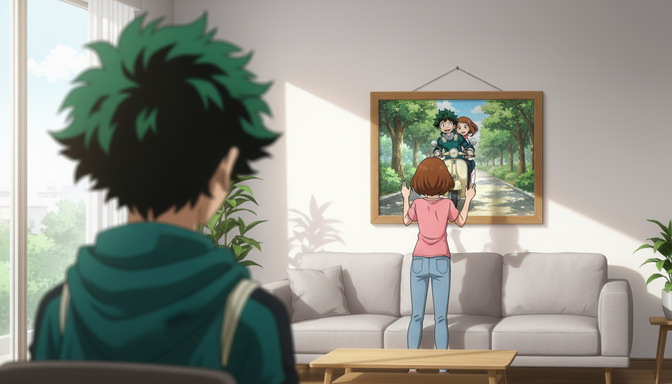
Sequencing clips into a complete video.
A single clip is a moment. Three or four clips, generated with your saved character across a consistent setting, become a scene with shape and tension. AutoWeeb lets you sequence clips into a short-form video using the scene builder, with your character appearing consistently across every cut. The full photo-to-video workflow, from first upload to a three-scene assembled video, is achievable in a single session. For a step-by-step walkthrough of the entire process, the guide to how to turn yourself into an anime video with AI covers each stage in detail.
👉 Try AutoWeeb Free — Convert Your Photo, Build Your Character, Generate Your First VideoFrequently asked questions about creating anime videos from photos.
What is the best AI tool to create anime videos from photos?
AutoWeeb is purpose-built for the photo-to-anime-video workflow. It converts your photo into a saved anime character, lets you restyle that character with different outfits and details, generates images placing the character into new scenes, and produces anime videos through a video agent powered by Seedance 2. That end-to-end workflow, photo to character to scene to video, is what separates it from general-purpose AI video tools that handle anime as one of many styles rather than the primary focus.
Can I turn my photo directly into an anime video?
Yes, but the most reliable path runs through saving a character first. Upload your photo, convert it to an anime character, save that character to your library, and then generate videos using the saved character as the reference. Skipping the save step and going directly from photo to video is possible, but the saved character approach produces more consistent results across multiple clips and lets you restyle the character between scenes without re-uploading the original photo.
How do I change my anime character's outfit without starting over?
From AutoWeeb's character editor, you can update any aspect of your saved character's appearance, including outfit, hair color, accessories, and visible details, without affecting the underlying facial identity derived from your original photo. The updated character carries those changes into every new image and video you generate. You can build multiple outfit configurations for the same character and swap between them depending on the scene.
Will my character look the same across different images and videos?
Yes. Because every generation references the same saved character from your library, the facial structure, hair, and core proportions stay consistent. The character doesn't drift between generations the way a text-only description does. Outfit updates you apply in the character editor carry forward automatically, so if you change their jacket for a new scene, that change is reflected in every generation you make after that point.
What kind of photo gives the best anime conversion?
A front-facing portrait with clear lighting and minimal obstruction across the face. Natural daylight or evenly lit indoor photos produce the strongest fidelity. Heavy filters, strong directional shadows, sunglasses, or hats that cover part of the face reduce the accuracy of the conversion. For most people, a clear smartphone selfie taken in decent light is sufficient. If you have multiple options, choose the one where your face is most clearly visible.
Do I need to know how to write AI prompts to generate anime videos?
No. AutoWeeb's video agent handles prompt construction. You describe the scene you want in plain English, and the agent converts that description into a properly structured Seedance 2 prompt with camera direction, motion language, and style anchoring. You review the prompt before generating and can adjust it, but most beginners find the agent's version gives them the result they want without needing to write or understand prompt syntax themselves.
How many scenes can I build in one session?
There's no scene cap per session. Most users complete the full workflow, photo upload to first clip, in under twenty minutes. Building two or three additional scenes typically takes another thirty to forty-five minutes depending on how much you iterate on each one. The full photo-to-saved-character-to-multi-scene-video workflow is achievable in a single sitting, and subsequent sessions are faster because your character is already saved and doesn't need to be rebuilt.
Can I use my anime character in images and then animate those specific images?
Yes. AutoWeeb lets you generate still images with your saved character placed in a scene, and those images can serve as the visual reference for a video generation. You can use a still image as the starting frame for a video clip, giving the animated output a precise visual anchor. This is useful when you've already generated an image you like and want to add motion to that specific composition rather than describing the scene from scratch in the video agent.
Is AutoWeeb free to try?
AutoWeeb offers a free tier that includes photo-to-anime conversion, the character creator with outfit and detail editing, and a limited number of image and video generations per month. That's enough to convert your photo, save and restyle your character, generate several scene images, and produce a short video clip, giving you a full run through the workflow before committing to a paid plan.
For a full comparison of how AutoWeeb's photo-to-video workflow stacks up against general-purpose AI video generators, the guide to the best AI anime video generator for beginners in 2026 breaks down what makes a purpose-built anime tool different from the alternatives. If you're exploring the character creation side in more depth before moving to video, the best AI anime generator for people without drawing skills covers the full character-building workflow from concept to polished scene.