How to Turn an Anime Image Into a Video With AI in 2026
The quality of your anime video is decided before you generate a single frame. It is decided when you create your image.
Turning an anime image into a video with AI is one of the most satisfying creative workflows available in 2026. It is also one of the most commonly misunderstood. Most beginners try to fix a bad result at the video stage. The creators who get great results every time fix it at the image stage, before any video generation runs.
This guide walks through the complete workflow, from creating your first character image to assembling a multi-scene anime sequence. Every step includes concrete prompt examples, the most common mistakes to avoid, and explanations of why each decision affects the final video.
Step 1: Create your character image
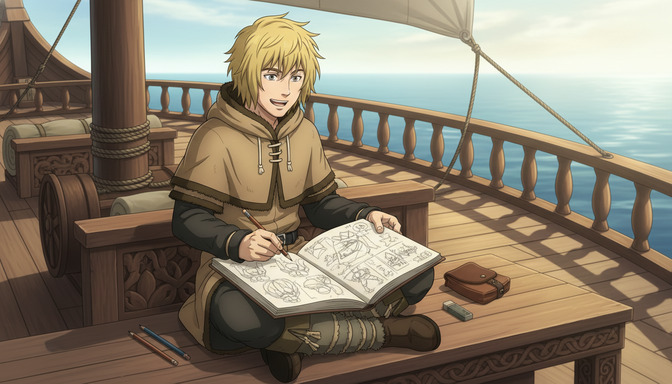
Every anime video begins with a character. Before you write a single prompt for a video, you need a character that is visually defined well enough to survive animation. A character without clear identity details, specific hair color, distinct facial features, recognizable clothing, will drift and deform during video generation. The AI will invent what it does not know.
Start by writing a character description that functions like a reference sheet. Every visual attribute should be specific. Not "a girl with dark hair" but "a girl with straight blue-black hair that falls to her collarbones, blunt cut with a subtle side part." Not "wearing a school uniform" but "wearing a white button-up shirt under a deep navy blazer with a plaid skirt in burgundy and hunter green." Specificity here is not pedantry. It is the difference between a character who stays consistent across clips and one who looks slightly different in every generation.
Character prompt example
Anime girl, long straight indigo-black hair, blunt cut just below the chin, large amber eyes with a subtle highlight, wearing a deep navy school blazer over a white collared shirt, burgundy plaid skirt, white knee socks, composed expression with a slight raised eyebrow, slight three-quarter angle facing left.
Save this description. You will use it in every image generation and video prompt for this character. It is your character sheet.
Step 2: Write and improve your image prompt for animation
A good anime image prompt and a good anime-ready image prompt are not the same thing. An image that looks great as a still can be a poor source for video generation. For animation, your image prompt needs to communicate several things that standard illustration prompts skip entirely.
The best image characteristics for animation
- A clear, single light source. Directional lighting, from a window, an overhead lamp, or golden hour, gives the video model spatial information about where shadows should fall when the character moves. Flat ambient lighting has nothing to animate.
- Foreground, midground, background separation. Depth layers give the camera something to move through. A character pressed against a flat wall removes that possibility.
- A specific, weighted pose. The pose should suggest the beginning of a movement. Leaning forward, mid-reach, looking toward something off-frame. Neutral T-poses and standing-at-attention poses give the model nowhere to go.
- Environmental detail that can move independently. Loose hair, fabric, steam, falling leaves, water. These elements animate cleanly and add visual life without requiring the character to move dramatically.
- Clean character edges without visual noise. The model needs to know exactly where the character ends and the background begins. Blurring, complex overlapping elements, or busy backgrounds that merge with the character cause instability during animation.
Improved image prompt example
Weak prompt: anime girl in a school uniform, kitchen background, standing.
Animation-ready prompt: anime girl with straight indigo-black chin-length hair, large amber eyes, deep navy blazer, burgundy plaid skirt, standing at a kitchen counter in a warm bright cooking space, three-quarter angle, her weight shifted to her left foot, right hand raised slightly as if making a point, natural light from a wide window at frame-left casting soft directional shadows, kitchen shelves with subtle depth blurred in the background, steam rising gently from a pot on the stove behind her, clean character edges, no foreground elements overlapping the character.
The improved prompt gives the video model lighting direction, a weighted pose, animatable environmental elements, and a clear character silhouette to anchor to.
Step 3: Generate a high-quality anime image
With your character description and improved prompt ready, generate your source image. Do not rush this step. Generate multiple variations if needed. The image you choose here is the foundation that every downstream generation will build on.
Why image quality determines video quality
The AI video model does not invent details. It reads your source image and extrapolates motion from it. A high-quality source image, sharp edges, coherent lighting, intentional composition, gives the model clear information to extend across time. A low-quality source image, muddy lighting, unclear character edges, flat composition, forces the model to guess, and guessing produces instability.
This is why two creators using the same video model can get wildly different results. The model itself is not the variable. The source image is. A cinematic, well-lit image with a strong character and deliberate composition will produce a stable, visually coherent video. A weak source image will produce drift, warping, and the facial deformation that makes AI animation look cheap.
When evaluating your generated image before moving to video, check: does the character have clearly defined features? Is the lighting directional? Is there background depth? Is the pose specific? If any of those answers are no, regenerate before you animate.
For a full checklist of what to look for before converting an image to video, the guide on 5 signs your AI anime image is ready to turn into video covers every quality signal in detail.
Step 4: Convert the image into a video
Your source image is ready. Now you submit it to the video generation model alongside a motion prompt. The motion prompt is not a description of the scene. It is a direction for what should move, how, and at what speed.
The single most important rule: describe one movement. Not three. Not a sequence. One clear, directed action. The model performs better with a specific, singular instruction than with a list of overlapping movements it has to reconcile.
Common mistakes when converting images to videos
Prompting for too much at once. "She turns, smiles, walks forward, picks up the bowl, and looks at the camera" is five movements in five seconds. The model will attempt all of them and produce visual chaos. Choose one: she turns. She picks up the bowl. She looks at the camera. One movement per clip.
Using emotional adjectives instead of physical descriptions. "Move dramatically" or "act excited" gives the model nothing to work with. "Her right hand gestures quickly as she leans forward, her hair swinging with the motion" is a physical description the model can render.
Ignoring the background. Backgrounds that warp, pulse, or breathe independently of the character break the illusion immediately. Keep background motion subtle. Steam, distant movement, or gently swaying environmental elements perform far more reliably than backgrounds with their own dramatic animation.
Choosing a source image with a flat pose. A character standing perfectly straight with arms at their sides has no energy to continue. A character mid-gesture, slightly off-balance, or in an expressive stance gives the model a motion state to extend.
Video prompt example for image conversion
Anime girl at a kitchen counter, she lifts her right hand and gestures toward the counter as she speaks, head turning slightly toward the camera, her hair shifting with the movement, steam from the pot behind her drifting upward, warm window light steady and consistent, camera static, no background movement beyond the steam, 4 seconds.
Step 5: Add camera movement
Static camera clips are functional but they are not cinematic. Camera movement is what transforms an AI anime clip from a moving image into something that reads like a scene from a series. The vocabulary of camera direction translates directly into video prompts.
How to create movement without distortion
The key to camera movement that does not distort the character is to keep camera motion slow and deliberate. Fast camera moves require the model to regenerate significant portions of the frame between frames, which introduces instability. Slow, linear movements, push-ins, gentle pull-backs, slow pans, give the model time to maintain consistency.
- Slow push-in: camera moves gradually closer to the subject. Best for building emotional intimacy or revealing detail. Combine with minimal character movement to keep the character anchor stable.
- Gentle pull-back: camera moves away from the subject to reveal the environment. Best for establishing shots or conveying isolation. Works well when the character is static.
- Slow pan left or right: camera moves horizontally across the scene. Best for revealing a second character or a wider environment. Requires clean horizontal background depth to avoid warping.
- Low-angle upward tilt: camera starts low and tilts up. Conveys scale, power, or a character's imposing presence. Keep character movement to zero during the tilt for maximum stability.
- Handheld drift: subtle naturalistic camera sway. Best for intimate, slice-of-life moments. The slight movement adds life without requiring complex generation.
Camera movement prompt example
Anime girl at kitchen counter mid-gesture, camera begins at medium shot and slowly pushes in to a close-up on her face and raised hand, she is gesturing and speaking but her feet stay planted, warm side lighting consistent throughout, kitchen background remains stable, only camera moves, 5 seconds, slow and steady push.
Adding "only camera moves" or "character stays grounded while camera moves" to your prompts is one of the most reliable ways to reduce distortion. It gives the model a clear instruction about what should and should not change.
Step 6: Add character actions
Character actions bring personality into the clip. They are also the step where most AI anime video attempts fail. The failure pattern is the same: too much movement requested, too little direction given, and the character warps under the weight of the instructions.
The approach that works is to think in terms of a single action beat: the moment before the action, the action itself, and the settle after it. Not a sequence of actions. One complete action with a beginning and an end.
Action prompts that work
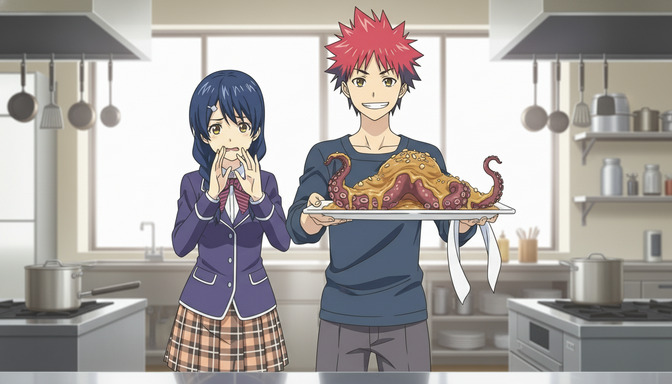
Anime boy with spiky red hair and a navy apron, he lifts a large serving platter with both hands from waist height to chest height with a triumphant expression, his shoulders squaring as the platter rises, slight movement in his hair from the momentum, camera static at medium shot, warm kitchen lighting, 3 seconds.
Anime girl with indigo-black hair, she turns her head from looking left to looking directly at the camera, a slight surprised expression crossing her face, one hand raises to her cheek, camera static at medium close-up, consistent bright kitchen light from the left, 2 seconds.
Short, specific, complete. Each of these prompts describes exactly one action from start to finish. The model has a clear entry state, a clear exit state, and a single motion path between them.
For more on how body language and gesture direction affect AI anime results, the guide on using poses to make your AI anime characters feel alive covers gesture and posture prompting in depth.
Step 7: Create multiple scenes
A single clip is a moment. Multiple clips connected by consistent characters, environment, and lighting become a scene. The jump from one clip to multiple clips is where AI anime video becomes storytelling.
The principle for creating multiple scenes that feel connected is to vary the camera angle and shot size while keeping the environment and lighting stable. Switching lighting setups or locations between clips costs you visual coherence. Switching from a wide shot to a close-up within the same kitchen, same window light, same counter, creates variety without breaking the sense that these clips belong together.
Multi-scene structure for a cooking sequence
- Wide establishing shot: both characters visible in the kitchen, camera static, sets the location and spatial relationship.
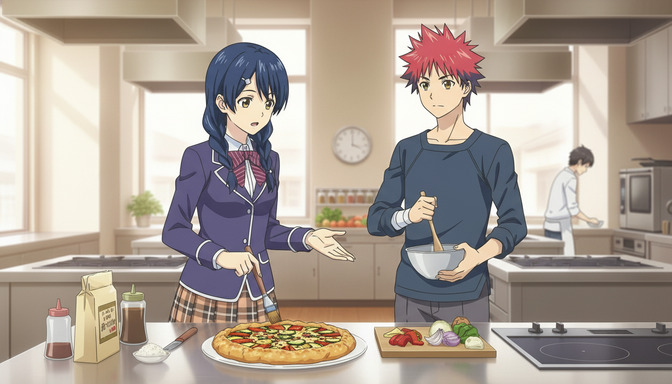
- Medium shot on character A: she gestures toward the ingredients, explaining something, camera slow push-in, 4 seconds.
- Reaction close-up on character B: his expression shifts from focused to surprised, slight eyebrow raise, camera static, 2 seconds.
- Action shot on character B: he raises the platter with both hands, triumphant energy, camera slightly low angle to convey the lift, 3 seconds.
- Reaction close-up on character A: she covers her mouth with both hands in shock, eyes wide, camera static at close-up, 2 seconds.
Five clips. One environment. Two characters. A complete scene arc from setup to reaction. This is how multi-scene AI anime is built: not by generating clips randomly and hoping they connect, but by planning the sequence before you generate anything.
Step 8: Build a complete anime sequence
A complete anime sequence is a collection of scenes that adds up to an emotional arc. Scene 1 establishes character and setting. Scene 2 introduces a conflict or moment of interest. Scene 3 resolves it. Even a 30-second sequence can carry the structure of a narrative if you build it with intention.
Why storyboards improve final video results
A storyboard is not a drawing exercise. For AI anime video, it is a numbered list of clip descriptions written before any generation runs. It serves three functions that directly improve your final output.
First, it forces clarity. When you have to write down what each clip is supposed to do, you discover vague spots in the plan before they cost you credits. "Something happens in the kitchen" becomes "character B lifts the platter to reveal the dish, low angle, 3 seconds." Clear from the start.
Second, it ensures continuity. A storyboard lets you check that the lighting, location, and character state are consistent across clips before you generate them. If clip 3 suddenly changes the lighting from warm to cold with no story reason, you catch it in the plan, not after the generation.
Third, it defines the emotional arc. When you can see the full sequence written out, you can see whether it builds, peaks, and releases in the way a real anime scene does. If all five clips are at the same emotional intensity, you can add a quiet moment to create contrast. If the arc ends on the wrong beat, you can add a final clip before you generate anything.
The guide on generating story ideas with AI before building your anime storyboard walks through the full pre-production process, from concept to scene structure.
Complete sequence storyboard example: cooking rivalry
Scene 1, Shot 1 (Wide, 3s): Both characters in a professional kitchen, camera static, warm overhead light. Character A gestures toward the empty counter: establishing shot, sets competition premise.
Scene 1, Shot 2 (Medium, 4s): Camera slow push-in on Character A as she explains the challenge, hand gesturing confidently, slight camera drift to her right, her expression focused and competitive.
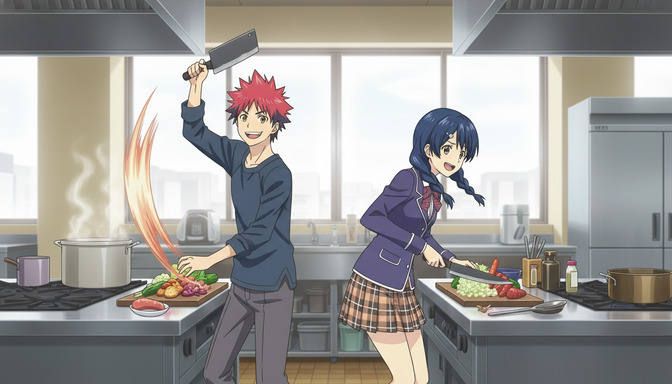
Scene 2, Shot 1 (Medium, 4s): Character B at a separate station, raising a cleaver dramatically, low angle tilt, fire-colored light briefly visible as motion blur trails behind the cleaver, energy and intent.
Scene 2, Shot 2 (Close-up, 2s): Character A's eyes widen, both hands coming up to cover her mouth, camera static, reaction held for a beat, no speaking.
Scene 3, Shot 1 (Medium, 4s): Character B lifts the completed dish platter to chest height with both hands, camera slightly low, triumphant expression, kitchen background stable.
Scene 3, Shot 2 (Wide, 3s): Both characters in frame, Character A's shocked expression giving way to a reluctant smile, camera slow pull-back to reveal the full kitchen and the finished dish between them. End.
Six clips, three scenes, one complete arc. Every clip has a purpose. The sequence builds from setup to climax to resolution. This is how an AI anime sequence earns the word sequence.
For advanced techniques on maintaining visual consistency across a full multi-character sequence, the guide on creating multi-character anime scenes using character sheets covers the workflow in full.
Frequently asked questions
What kind of anime image works best for video conversion?
An image with directional lighting, a specific weighted pose, visible foreground and background depth, clean character edges, and at least one environmental element that can move independently, hair, fabric, steam, falling particles. The more visual information the image contains, the more the model has to work with when generating motion.
Why does my anime character look different in the video than in the source image?
Character drift is the most common problem in AI anime video. It happens when the model does not have enough stable visual information to anchor the character's identity across frames. Fix it by using a source image with sharp, clearly defined character features, writing a detailed character description that you include in every video prompt, and avoiding complex multi-movement prompts that force the model to reinvent the character's appearance at multiple frames.
How long should each AI anime video clip be?
Three to five seconds per clip is the reliable range. Longer clips ask the model to maintain consistency over more frames, which increases the likelihood of drift and warping. Real anime is cut faster than most people expect. Short, purposeful clips edited together produce better results than long clips trying to contain multiple actions.
Can I add camera movement and character movement in the same clip?
You can, but it increases the risk of instability. When starting out, keep them separate: camera movement with a static character, or character action with a static camera. Once you have a feel for how the model handles each independently, you can begin combining subtle camera drift with simple character gestures. Slow and deliberate camera movement paired with minimal character action is the combination most likely to produce clean results.
Do I need a storyboard for every video I make?
For a single standalone clip, no. For anything that needs to work as a connected sequence of two or more clips, a basic shot list is essential. Without planning, clips will not share visual logic and you will regenerate them repeatedly trying to make them match rather than building them to match from the start.
What is the most common mistake beginners make when converting images to videos?
Skipping the image quality step. Beginners generate a decent-looking image quickly, feed it to the video model, and then spend a long time wondering why the output is unstable. The answer is almost always in the source image: flat lighting, ambiguous character edges, a neutral pose with no energy to extend. Spend more time on the image and the video step becomes far less frustrating.
How do I keep consistent characters across multiple video clips?
Use the same source image or a closely matched one across clips in the same scene. Write a fixed character description and include it in every generation prompt. Avoid regenerating the character image from scratch between clips. The more visual reference the model has, the less the character will drift across your sequence.
Can I use AutoWeeb if I have never made an anime video before?
Yes. AutoWeeb is designed for creators at every experience level. The character creator handles identity consistency so your characters stay recognizable across every clip. The story agent helps you build scene structure and shot lists before you generate. The prompting tools guide you toward the specific language that produces quality results. You do not need prior experience. The workflow teaches you as you use it.
Related Blog Posts
How to Use Poses to Make Your AI Anime Characters Feel Alive
A character standing still in every scene is not a character. It is a placeholder. Posing is what turns a design into a person.
Learn how to use poses in AI anime art to express emotion, drive action, and tell stories. Covers body language, action poses, romantic poses, group compositions, camera angles, and common mistakes.
5 Signs Your AI Anime Image Is Ready to Turn Into Video
Not every image that looks good as a still will animate cleanly. Here is what to check before you run it through your image-to-video model.
Learn the 5 signs that your AI anime image is ready for video generation. Check character consistency, clean anatomy, visible hands, facial expressions, composition, and background quality before animating.
How to Create Multi-Character Anime Scenes Using Character Sheets
Character sheets are the difference between a cast that stays consistent across every scene and characters that look like strangers to each other.
Learn how to use character sheets to generate consistent multi-character anime scenes with AI. Covers reference images, character descriptions, group shots, and common mistakes.
How to Write Better AI Anime Image Prompts for Consistent Results
The gap between a vague output and a character that looks the same every time almost always lives in how the prompt was written.
Learn how to write AI anime image prompts that get consistent results. Character descriptions, lighting, camera angles, art styles, and before-and-after examples for beginners.
Explore AutoWeeb
Jump into the tool that fits your creative step.
AI Anime Video Generator
Animate storyboard shots into cinematic clips with Seedance 2 and consistent characters.
Anime Character Creator
Design original characters with consistent sheets across every scene.
AI Anime Image Generator
Generate cinematic anime stills anchored to your character library.
Turn Photo Into Anime
Upload any photo and watch AI turn it into stunning anime art in seconds.
AI Anime Location Generator
Create a location set once, then generate reference images from every angle.
AI Anime Storyboarding
Describe your idea, pick your characters, and let AI draft the script and scenes.
AI Anime Prompt Agent
Turn a rough idea into a cinematic Seedance 2 prompt with the AI Director.