How to Maintain Character Consistency in Seedance 2.0 Videos
The character who looks perfect in scene one should look exactly the same in scene seven. That does not happen by accident.
Character consistency is the single hardest problem in AI anime video production. Not prompting. Not camera movement. Not lighting. Keeping your character looking like themselves from one clip to the next is what separates creators who build actual series from creators who generate impressive one-off clips.
Seedance 2.0 is powerful. It produces fluid motion, handles fabric and hair beautifully, and responds well to specific directorial prompts. But it does not remember your character between generations. Every clip starts fresh. Without a deliberate consistency system in place, your protagonist will have subtly different eyes in scene three, different hair in scene five, and a different outfit by scene eight. The AI is not malfunctioning. It is doing exactly what it was built to do: filling in gaps with its best inference. Your job is to leave no gaps.
Step 1: Understand why AI models drift between scenes
Seedance 2.0 generates each video clip independently. It does not maintain a persistent model of your character in memory. When you generate clip two, the model has no access to clip one. What it has is your source image and your text prompt. If either of those leaves room for interpretation, the model fills that room with variation.
Drift accumulates through gaps in specificity. A character described as "a girl with long dark hair and a red outfit" will drift immediately, because that description matches thousands of possible visual interpretations. Long dark hair could be straight, wavy, or textured. Red outfit could mean a dress, a robe, a jacket, a uniform. The model is not wrong for making different choices each time. It was never given enough information to make the same choice twice.
The places where drift appears most visibly are facial features (eye shape, eye color, and expression default), hairstyle (texture, length, and any distinctive elements like hair ornaments), outfit details (silhouette, color value, fabric texture), and accessories. These are precisely the details that must be locked into your character sheet before you generate a single video clip.
Step 2: Build a character sheet with front, side, and expression views
A character sheet is not a finished illustration. For AI video production purposes, it is a written and visual specification document. It defines exactly who the character is so completely that the model cannot reasonably produce a different result.
The written portion of your character sheet should cover every visual attribute in specific, concrete language. Not adjectives that describe impression, but attributes that describe fact. Here is what a complete written character sheet looks like for a period drama protagonist:
Character: Lady Wei — Front view: oval face, large almond-shaped eyes with dark irises and a single white highlight point, arched brows slightly higher on the outer edge, small straight nose, neutral-to-gentle default expression. Side view: straight nose bridge in profile, hair swept back from the face, no stray strands framing the cheek. Hair: long straight blue-black hair to mid-back, pinned up in an elaborate bun with a jade and silver hairpin at the crown, two small ornamental flowers woven into the left side, no loose strands except a single thin piece on the right temple. Outfit: deep cobalt blue hanfu with soft lavender inner layer visible at collar and cuffs, long flowing sleeves with a pale blue gradient toward the hem, silk fabric quality with soft sheen. Accessories: silver pendant necklace with a small teardrop stone, jade hairpin (described above), no rings, no earrings visible.
Save this description as a block of text you paste into every generation prompt involving this character. The reference image — a clean, well-lit front-facing portrait generated from this description — is the other half of the system.
Why reference images matter
A text description tells the model what to generate. A reference image shows it. When you provide a strong source image alongside your written character description, you give the model both channels of information simultaneously. The image anchors the visual identity while the text description reinforces it. Together, they dramatically reduce the probability of the model introducing variation.
Your reference image should be a clean three-quarter or front-facing portrait: no dramatic expression, no motion blur, neutral background, strong lighting that makes every feature clearly legible. This is not your hero shot. It is your identity document for the character.
For more on building characters that survive the translation into video, the guide on creating multi-character anime scenes using character sheets covers the full workflow for maintaining two or more characters in the same project.
Step 3: Write prompts that reinforce character identity
A video prompt that skips the character description is the most common consistency mistake in Seedance 2.0 projects. Creators write their character sheet once, generate the source image, then write video prompts that describe only the action and camera movement. The model infers what it can from the source image, but without a written reinforcement of identity in the prompt itself, drift accumulates.
The rule is: every video prompt begins with a compressed version of the character sheet. Not the full paragraph, but every defining attribute on one line. Then the scene. Then the action. Then the camera.
Prompt structure for consistent characters
Weak prompt: Lady Wei walks through a courtyard, cherry blossoms falling, camera slow pan left.
Consistency-reinforced prompt: Lady Wei, long straight blue-black hair in an elaborate bun with jade hairpin, deep cobalt hanfu with pale lavender inner layer, almond eyes, composed expression — she walks slowly through an open stone courtyard, cherry blossoms drifting down from trees at frame-left, her sleeves moving gently with each step, camera slow pan left following her movement, warm afternoon light from frame-right casting soft directional shadows, 5 seconds.
The difference is not just length. It is the placement of identity before action. The model processes the character description before it processes the movement instruction. Front-loading the visual identity anchors the character before the model begins generating any motion.
Reinforcing accessories and distinctive elements
Accessories are the first thing to drift. A hairpin described in scene one will be gone or transformed by scene four if you do not name it in every prompt. The same applies to distinctive outfits, layered clothing, and any element that makes your character visually recognizable. Name them every time. The model does not retain this information between generations.
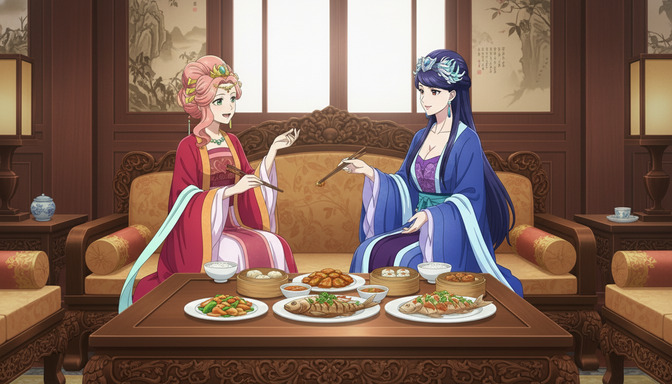
Lady Rong, crimson hanfu with diagonal gold embroidery at the collar, pink hair pinned in a high court style with red and gold ornaments, jade pendant necklace visible at the neckline, warm dark eyes with a slight upward tilt — she reaches across the carved table to pick up a piece of dim sum, her sleeve trailing the edge of the serving dish, camera static at medium shot, warm candlelit interior, 3 seconds.
Every distinctive visual element is named. Every generation that uses this prompt has the same source of truth. See the guide on writing better AI anime video prompts without wasting credits for the full breakdown of prompt structure.
Step 4: Use a storyboard to plan consistency across multiple scenes
Storyboarding is where multi-scene consistency is won or lost before a single credit is spent. A storyboard for AI anime video is not a visual sketch. It is a numbered shot list that defines the character state, environment, lighting, and camera position for every clip before you generate any of them.
The consistency value of a storyboard is in what it reveals during planning. When you write out all six or eight clips side by side, you can see exactly where the lighting changes without story reason, where the character's emotional state conflicts between adjacent clips, and where you have accidentally introduced continuity errors that will be expensive to fix after generation.
Storyboard example for a two-character period drama sequence
Shot 1 (Wide, 4s): Both characters visible in a carved wooden dining hall, warm candlelight, camera static. Lady Rong pours tea. Establishes setting and character placement.
Shot 2 (Medium, 3s): Camera slow push-in on Lady Wei, she receives the tea with both hands, slight downward bow, composed expression, her cobalt sleeves visible. Establishes formal dynamic.
Shot 3 (Medium, 3s): Lady Rong seated across the table, she leans slightly forward, one hand gesturing toward a dish, warm expression. Camera static. Character A's crimson robe and gold embroidery visible at the neckline.
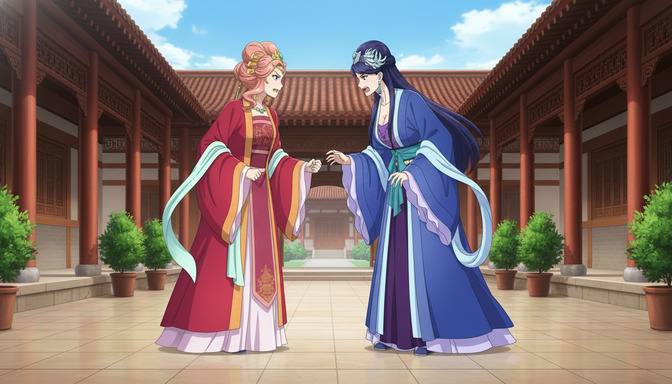
Shot 4 (Exterior wide, 5s): Courtyard, both characters facing each other, cherry blossoms falling, camera very slow pull-back to reveal full courtyard architecture. Lighting shifts to warm afternoon sun. First scene transition.
Writing the shot list this way forces you to define the lighting transition between interior and exterior before generation. It forces you to confirm that the character positions and eyelines make physical sense between adjacent cuts. And it gives you a reference document to check consistency against after generation, clip by clip.
For full guidance on building scene structure before you generate, the guide on generating story ideas with AI before building your anime storyboard covers pre-production from concept through shot list.
How AutoWeeb character sheets maintain consistency automatically
AutoWeeb's character creator is designed specifically to solve the consistency problem at the source. When you build a character in AutoWeeb, the system generates and stores a complete visual reference: front view, three-quarter view, and a set of expression references. These images become the anchoring source for every downstream generation.
When you generate a video clip in AutoWeeb using a saved character, the character sheet reference is attached to the generation automatically. You do not need to manually paste the character description into every prompt. The system handles the identity reinforcement so that your focus stays on scene direction and camera movement.
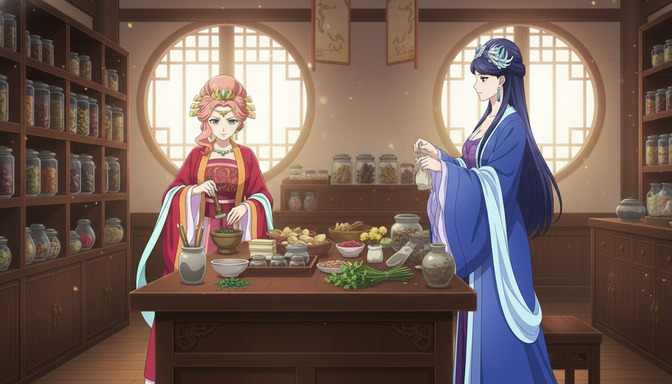
For multi-scene projects with two or more characters, AutoWeeb tracks each character separately and applies their respective sheets when they appear in a scene. This is what makes scenes like the dining hall and courtyard examples in this post possible: same characters, completely different environments, zero drift.
Common character consistency mistakes
- Writing a character description once and never using it again. The character sheet only works if you include it in every prompt. It is not a one-time setup. It is a document you paste at the start of every generation.
- Using vague descriptors instead of specific ones. "Dark hair" generates infinite variations. "Straight blue-black hair pulled into an elaborate court bun with a jade pin at the crown" generates one.
- Regenerating the source image mid-project. Once you have a strong source image for a character, use it as the base for every clip in the project. Regenerating the source image introduces a new visual reference that will conflict with earlier clips.
- Omitting accessories and distinctive details from video prompts. Hairpins, pendants, embroidery details, and distinctive layering are the first elements to drift. Name them in every prompt.
- Changing the lighting between scenes without accounting for it. A character generated under warm candlelight will look visually inconsistent with a version generated under cold exterior daylight. This is not drift. It is a lighting decision. Make it intentionally and describe both lighting states explicitly.
- Using the same source image across two very different characters. If your project has two characters with similar builds, generate distinct, clearly differentiated source images before you begin. Hair color, outfit color, and face shape must be clearly distinguishable or the model will occasionally conflate them.
Best practices for multi-scene anime projects
- Create a character file for every character before any generation starts. Written description plus front-facing reference image. Do this first.
- Define your environment lighting at the start of each scene location. Warm candlelit interior, cool exterior afternoon, golden hour garden. Name it once in the storyboard and repeat it verbatim in every shot within that location.
- Keep clips short, between three and five seconds. Shorter clips require the model to maintain consistency over fewer frames. They also cut together more cleanly.
- Build from a single shot before expanding. Generate one clean clip with your new character in a new environment. Evaluate consistency against your reference image before generating the remaining shots in that scene. Catch drift early.
- Generate reaction shots with static cameras. Close-ups and reaction shots introduce the most facial drift because the character's face fills the frame and small variations are immediately visible. Static camera with minimal character movement produces the most stable close-up results.
- Use your storyboard to audit continuity before generation, not after. The storyboard is most valuable as a pre-check document. Five minutes spent catching a continuity error in planning saves thirty minutes of regeneration.
The guide on turning anime images into videos with AI covers the complete end-to-end workflow from image creation through multi-scene sequence building.
Frequently asked questions
Why does my character look different in every Seedance 2.0 clip?
Seedance 2.0 generates each clip independently. It does not retain memory of previous generations. If your character description is not included in every video prompt, the model fills in the missing details with variation. The fix is to front-load every prompt with a compact but complete character description before any scene or action instruction.
What should a character sheet include for AI video generation?
At minimum: eye shape and color, hair color, texture, length, and any distinctive styling, outfit described by silhouette and color, any significant accessories (hairpins, jewelry, distinctive clothing details), and a default expression state. For period or fantasy characters, also name the fabric quality and any embroidery or ornamental detail that makes the outfit recognizable.
Do I need a front view, side view, and expression views?
For Seedance 2.0 video, a strong front or three-quarter reference image is most important because that is the view the model sees most often. Side views are valuable when your storyboard includes profile shots. Expression reference sheets are most useful for projects with significant emotional range across scenes, where you want the model to have a baseline for what a surprised or joyful version of the character looks like.
How do I keep two characters consistent in the same scene?
Write a separate character description for each character and include both in every prompt where they share a frame. Order them clearly: "Character A [full description] and Character B [full description], both in [scene]." Keep their visual designs clearly differentiated, different hair colors, different outfit colors, different silhouettes, so the model has no ambiguity about which description belongs to which figure.
What is the most important thing I can do to prevent character drift?
Use the same high-quality source image as the generation base for every clip in a scene. A consistent source image anchors the character's visual identity far more powerfully than any prompt can on its own. When the image and the written description agree on every detail, the model has no reason to invent variations.
Does Seedance 2.0 handle accessories like hairpins and jewelry consistently?
It can, but accessories are the most fragile detail category in AI video generation. A jade hairpin named in a source image may drift in shape, size, or disappear entirely by the third clip if it is not named explicitly in every prompt. Be specific about accessories: "jade and silver hairpin shaped like a peony at the crown of the bun" is recoverable. "Decorative hairpin" is not.
How many characters can I maintain consistency for in a single project?
Two characters is the practical working limit for most creators using a manual character sheet system. Three is achievable but requires very careful prompt discipline. AutoWeeb's character system handles multiple characters with automatic reference attachment, which removes the manual overhead and makes three- and four-character projects significantly more manageable.
Can I fix character drift after I have generated the clips?
Not easily. Regeneration is the only real fix, which means the cost of catching drift late is high. The most efficient approach is to generate one test clip per character per new environment and evaluate consistency before generating the full scene. Catching drift at the first clip costs one generation. Catching it at the sixth costs six regenerations and potentially more if earlier clips need to be redone for continuity.
Related Blog Posts
How to Use Poses to Make Your AI Anime Characters Feel Alive
A character standing still in every scene is not a character. It is a placeholder. Posing is what turns a design into a person.
Learn how to use poses in AI anime art to express emotion, drive action, and tell stories. Covers body language, action poses, romantic poses, group compositions, camera angles, and common mistakes.
5 Signs Your AI Anime Image Is Ready to Turn Into Video
Not every image that looks good as a still will animate cleanly. Here is what to check before you run it through your image-to-video model.
Learn the 5 signs that your AI anime image is ready for video generation. Check character consistency, clean anatomy, visible hands, facial expressions, composition, and background quality before animating.
How to Create Multi-Character Anime Scenes Using Character Sheets
Character sheets are the difference between a cast that stays consistent across every scene and characters that look like strangers to each other.
Learn how to use character sheets to generate consistent multi-character anime scenes with AI. Covers reference images, character descriptions, group shots, and common mistakes.
How to Write Better AI Anime Image Prompts for Consistent Results
The gap between a vague output and a character that looks the same every time almost always lives in how the prompt was written.
Learn how to write AI anime image prompts that get consistent results. Character descriptions, lighting, camera angles, art styles, and before-and-after examples for beginners.
Explore AutoWeeb
Jump into the tool that fits your creative step.
AI Anime Video Generator
Animate storyboard shots into cinematic clips with Seedance 2 and consistent characters.
Anime Character Creator
Design original characters with consistent sheets across every scene.
AI Anime Image Generator
Generate cinematic anime stills anchored to your character library.
Turn Photo Into Anime
Upload any photo and watch AI turn it into stunning anime art in seconds.
AI Anime Location Generator
Create a location set once, then generate reference images from every angle.
AI Anime Storyboarding
Describe your idea, pick your characters, and let AI draft the script and scenes.
AI Anime Prompt Agent
Turn a rough idea into a cinematic Seedance 2 prompt with the AI Director.