How to Turn Your Wattpad Story Into an Anime Series with AI
A complete guide for Wattpad authors who want to adapt their stories into indie anime, from episode structure and character sheets through storyboards, AI image generation, and video production.
Every Wattpad story that has ever generated comments like "this needs to be an anime" carries that feedback for a reason. The story has scenes that belong on screen: the confrontation that shifts the entire arc, the quiet moment before everything breaks, the rival who makes the protagonist better just by existing. Readers imagine it animated because the material earns that response. The gap between that reader impulse and an actual animated episode used to require a production team, a budget, and years. AI has compressed that gap considerably.
This guide is for Wattpad authors who want to adapt their stories into an anime series, and for writers without animation experience who want a practical production path from existing chapters to viewable episodes. It covers the full pipeline: identifying which story to adapt, structuring it into episodes, building consistent character references, storyboarding key scenes, generating anime images, creating animated video, and releasing the finished work to an audience that already knows your name.
Step 1: Identify Your Strongest Story and Determine Its Format
Not every Wattpad story is the right starting point. The best story to adapt is not necessarily your most-read one. It is the one with the clearest visual premise, the most distinct cast of characters, and scenes that are already doing the work that anime does well: physical confrontation, emotional subtext, the moment when something changes and cannot be unchanged.
Look at your catalog and ask which story has an opening chapter strong enough to function as a first episode without requiring extensive backstory. A story that opens with the protagonist already in conflict is easier to adapt than one that begins with two chapters of world-building before anything happens. If your strongest story is the second type, identify the chapter where the real premise activates and consider whether that is where the series should start.
Determine the format before building anything else. A single short film works for a complete story under ten chapters with one central emotional arc. A three-to-six episode mini-series suits a story with a defined beginning, middle, and end and a secondary character whose arc runs parallel to the protagonist's. A full ongoing series makes sense if the story is long-running, has multiple arcs already written, and has an audience who already reads it. Starting smaller is not a compromise. A three-episode adaptation released in full is more useful than a planned twelve-episode series that stalls after the pilot.
Step 2: Adapt Your Story Into Anime Episodes
Translating written chapters into anime episodes is a structural problem, not just a formatting one. A Wattpad chapter can contain narration, internal monologue, and summary that anime has to externalize or cut. The goal is not to animate every sentence. It is to identify what each chapter is actually doing and find the visual equivalent.
Map each episode around one central emotional event, not a plot summary. A good episode asks a question in its opening minutes, complicates it in the middle, and either answers it or raises a harder version of it by the end. Take your chapters and ask: what is the one thing that changes in this section? That change is the episode's spine. Everything else is either setup, texture, or cut.
Breaking Chapters Into Scenes
A scene in anime requires a location, at least two characters or one character in active internal conflict, and a specific beat where something shifts. Go through your chapters and mark every time the location changes or the emotional register changes. Each of those marks is a potential scene boundary. Aim for four to six scenes per episode, with the longest scene being the one carrying the most emotional weight in the episode's arc.
Identifying Key Emotional Moments for Visual Treatment
Every story has three or four scenes that readers remember specifically, the ones that generated the most comments or the most emotional responses. List them. These are your priority storyboard panels and your priority animation targets. Every production decision downstream should be in service of making these moments land as well animated as they do in text.
Step 3: Design Consistent Anime Characters
Consistent character design is the technical foundation that makes everything else work. If your protagonist looks different between episodes because you are generating them from a fresh description each time, the series loses the visual coherence that makes it feel like a series rather than a collection of scenes. The solution is building character sheets before generating any story content.
A character sheet is a reference document that fixes the visual details of a character across every scene they appear in: hair color and style, eye color, build, default outfit, and a set of expressions covering their emotional range. For the protagonist, build at minimum a neutral expression, a determined expression, and a vulnerable expression. For the main antagonist, build their default composure and the expression that appears when something breaks through it.
Example character sheet prompt for a Wattpad protagonist: "Female, late teens, sharp amber eyes with a quality of assessment that makes her look older than she is. Long black hair worn in a practical high ponytail with a few strands loose at the temples. Lean build, the kind that comes from staying in motion rather than training. Default outfit: fitted charcoal jacket with an asymmetric collar over a white top, dark straight-leg pants, worn ankle boots. Expression in this sheet: neutral and watchful, jaw slightly set, looking slightly past the camera as if tracking something the viewer cannot see yet. Anime style, clean linework, consistent with shonen-adjacent drama aesthetic."
Build a character sheet for every character who appears in more than two scenes. Save them in AutoWeeb's project library before generating any story panels. This is the step that separates a consistent series from a collection of images that happen to share a premise.
Step 4: Create Anime Storyboards
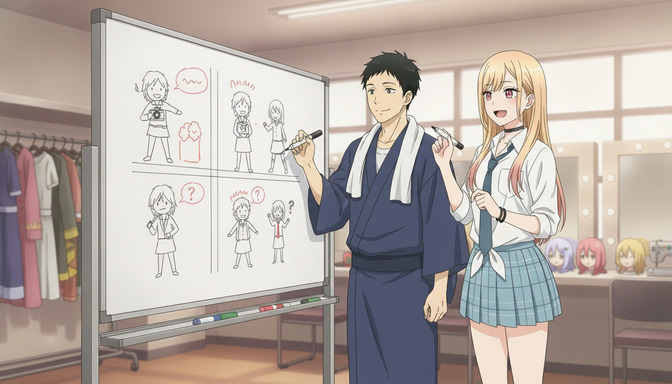
Storyboarding is the step that translates your scene list into visual sequences. Each storyboard panel describes a single shot: what is in the frame, where the camera is placed, and what emotional information the composition is carrying. You do not need to generate images at this stage. Writing the panel descriptions in sequence is enough to build the production map.
For each priority scene, plan the shot sequence before generating anything. Identify the establishing shot, the reaction shots, and the climax frame. The climax frame is the single image that carries the most weight in the scene, the one a reader would stop on. Write that frame description first, then work backward to build the shots that make it land.
Planning Shots and Camera Angles
Wide shots establish location and power dynamics. A character who occupies more of the frame than the person they are talking to reads as dominant, even if the scene does not say so. Close-ups on hands, eyes, or the space between characters carry emotional texture that dialogue alone cannot. Low angles make characters feel imposing. High angles make them feel exposed. These are not complicated principles, but they produce significantly better scenes when applied deliberately rather than accidentally.
Example storyboard sequence for a confrontation scene: "Panel 1: Wide establishing shot, two characters facing each other in a school rooftop setting, late afternoon light, the city visible behind them in soft focus. One character slightly closer to the camera, dominant in the frame. Panel 2: Medium close-up on the protagonist's face, expression shifting from composed to something that costs more. Panel 3: The antagonist's hands, both flat against the railing, the knuckles carrying the tension the face is hiding. Panel 4: Over-the-shoulder shot facing the protagonist, the antagonist partially in frame, the city still visible, the space between them larger than it should be for two people having this conversation. Anime style, late golden hour lighting."
Step 5: Generate Anime Images
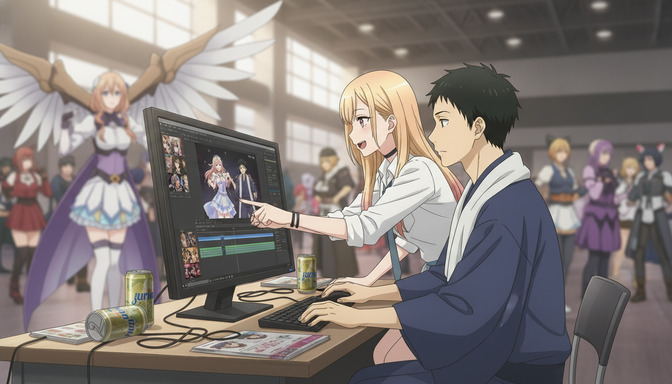
With character sheets saved and panel descriptions written, image generation becomes execution rather than improvisation. Each panel description already specifies the shot, the characters involved, their expressions, and the setting. AutoWeeb draws from the saved character references to maintain visual consistency across every image in the sequence.
Generate backgrounds separately from character scenes where the setting is important enough to carry its own panel. A location that appears in multiple episodes, the protagonist's school, the rooftop where the key confrontation happens, the antagonist's territory, deserves a dedicated background reference built before generating any scenes set there.
Example background prompt: "Anime school rooftop at late afternoon, golden hour. Concrete floor with visible seams, a low metal railing running along the edge, the city skyline visible below in soft focus. Overcast at the edges of the sky, with the last direct light coming from just above the horizon. A single vending machine against the rooftop access door on the right side of the frame. The space feels elevated and private, the kind of place where important conversations happen because no one else can hear them. Anime style, atmospheric, no characters in frame."
For action sequences, generate the impact frame first. The moment of contact, the peak of motion, the expression at maximum emotional intensity. Then generate the frames immediately before and after. Audiences read action sequences backward from the impact, so building from that outward produces more coherent sequences than trying to build linearly.
Step 6: Turn Images Into Anime Video
Not every panel needs to become animated video. The scenes that benefit most from motion are the ones with inherent physical or emotional arc: a character moving through a space under pressure, an action sequence where the stakes are visible in the motion itself, a scene where a character's body language is the primary text. Still panels work efficiently for dialogue-heavy scenes, reaction moments, and establishing shots where the composition carries the information without requiring movement.
Write motion descriptions for each panel you plan to animate before using the video generation tool. A motion description specifies what moves, how it moves, and what the camera does during the movement. The more specific the description, the more the resulting video will match the storyboard intention.
Example motion prompt: "Female protagonist walking across a school rooftop toward the camera, mid-afternoon. Her movement is deliberate, not hurried. Her ponytail moves with the wind. The camera holds a medium-close shot and slowly pulls back as she walks forward, maintaining roughly the same frame size, the city visible over her shoulder getting slightly larger as she approaches. Her expression is composed but her hands, visible briefly at her sides, are not relaxed. Duration six seconds. Anime style, atmospheric, late golden hour lighting."
Sequence the animated panels in episode order once all priority scenes are generated. Each episode should open with an establishing shot that locates the audience, build through the scene sequence planned in storyboarding, and close on either a resolved beat or a deliberate open question. The transition between episodes carries as much weight as the episodes themselves: end on a frame that makes the next episode feel necessary rather than optional.
Step 7: Publish Your Indie Anime and Build Your Audience
YouTube is the primary release platform for indie anime because it supports full episode length, allows chapter markers that map to the episode structure, and builds a permanent archive that audiences can share and return to. Upload each episode as a standalone video with a title that names the series and the episode clearly. A viewer who finds episode three should be able to identify the series and navigate backward without confusion.
Short clips cut from the most visually striking moments serve as social media previews, particularly for TikTok, Instagram Reels, and YouTube Shorts. The first fifteen seconds of your best action sequence, the single most emotionally loaded panel animated, the moment that generated the most comments in the original Wattpad version: these are the clips that introduce the adaptation to people who have not read the story. Keep them under sixty seconds and end on a frame that makes the full episode worth finding.
Your Wattpad audience is your warmest release channel. An author's note announcing the adaptation, a direct link to the first episode, and a clip of the scene your readers have been asking to see animated: that combination will move a percentage of your existing readership into viewership immediately. Readers who already care about your characters do not need to be convinced to watch. They need to know where to find it.
Why AutoWeeb Makes This Process Possible for Indie Creators
The production pipeline described above, character sheets, storyboards, consistent image generation across multiple scenes, and AI video output, runs inside a single AutoWeeb project. The character sheet built in step three is the same reference active when you generate the climax sequence in step five. The protagonist's amber eyes and charcoal jacket in the opening episode are the same in the finale because both panels draw from the same saved reference rather than from a new description approximating the original.
- Character sheets maintain visual consistency across every panel, every episode, and every session
- Storyboard tools let you plan scene sequences before committing to image generation
- AI image generation produces character scenes, backgrounds, and action panels from your saved references
- AI video generation turns storyboard panels into animated sequences with described motion
A traditional anime production requires a team handling each of these functions as separate specialized disciplines. AutoWeeb puts all of them inside one workflow, which means a solo creator or a small writing group can move from finished Wattpad chapters to a releasable anime episode without hiring a studio or rebuilding visual context from scratch each session.
Frequently Asked Questions
How many Wattpad chapters should I adapt per episode?
There is no fixed ratio, because chapter length on Wattpad varies significantly. A better measure is emotional events: aim for one to three major emotional beats per episode, regardless of how many chapters they span. If two chapters cover a single continuous confrontation, that is one episode. If one chapter has three distinct location changes and three separate emotional shifts, it might be two episodes. The episode should feel like a complete arc, not a segment of one.
Do I need animation experience to create an anime series with AutoWeeb?
No. AutoWeeb handles the technical execution: image generation, video creation, and maintaining visual consistency through saved character references. What you contribute is the story structure, the panel descriptions, and the creative decisions about which moments to prioritize. The storyboarding process is essentially descriptive writing with spatial awareness, and Wattpad authors already write with spatial and emotional precision. The shift to storyboard writing is smaller than it looks from the outside.
How do I keep my characters looking consistent across multiple episodes?
Build a full character sheet for every character who appears in more than two scenes, and save those sheets in AutoWeeb's project library before generating any story panels. Every subsequent image generation pulls from those saved references rather than from a new description. The character in episode one and the character in episode six are drawn from the same visual document. The consistency is structural, not something you need to manage manually each session.
Should I adapt an ongoing Wattpad story or a completed one?
Both work, but for different reasons. A completed story gives you the full narrative arc before you design anything, which means you can build character references that account for how a character looks at the end of the story rather than just the beginning. An ongoing story lets you adapt and publish in parallel with your writing, which keeps both the Wattpad audience and the anime audience engaged simultaneously. If you are starting your first adaptation, a completed story with a defined ending is technically easier because the structure is already resolved.
Can I use AutoWeeb to adapt a fantasy or sci-fi Wattpad story, not just contemporary settings?
Yes. World-building in anime terms means building environment references the same way you build character references: establish the visual rules of the world before generating scenes set in it. A fantasy story with a specific magic system and distinct architecture needs a set of location references saved to the project library before the first episode panels are generated. Once those references exist, every scene set in that world draws from the same visual vocabulary. The genre does not change the workflow. The scope of the reference library you build in the early steps does.
What is the best way to announce an anime adaptation to my Wattpad audience?
An author's note chapter posted to the original story is the most direct channel, because it reaches readers who have already followed or bookmarked the work. Include a clip of the scene your readership has referenced most in comments, a direct link to the first episode on YouTube, and a brief description of what the adaptation covers. Avoid announcing before you have at least one complete episode released: a promise of an anime is less compelling than a viewable first episode. The announcement and the release should happen at the same time.
How many episodes should I produce before releasing the first one?
Release the first episode as soon as it is complete rather than waiting to stockpile several. Early audience feedback tells you which scenes are landing as intended and which are losing something in the translation from text to visual. That information is more valuable during production than after. Aim to have the second episode at least in storyboard stage before releasing the first, so you can respond to early feedback without the first episode being the only thing available for several weeks.
For the broader framework of taking an anime concept from idea through production, the guide on how to plan and produce your own AI anime series from scratch covers series structure, episode planning, and production pipelines in detail. If you want to sharpen your storyboarding for high-impact moments, how to storyboard epic AI anime fight scenes like a director covers composition, impact frames, and camera angle decisions that apply directly to the scenes your readers have been asking to see animated.