From Character to Storyboard: Create Your First AI Anime Story Step-by-Step
Most people want to make an anime story but don't know where to start. Start here.
Making an anime story is not one thing. It is seven things done in the right order. Most people either skip the foundations — character, story structure, script — and go straight to generating images that end up feeling random and disconnected. Or they get stuck in the planning stage and never generate anything at all. This guide is the middle path: a complete step-by-step workflow from first character concept to finished animated scene, using AI tools at every stage.
AutoWeeb handles the full pipeline: character creation, storyboarding, image generation, and video generation from a single workspace. You do not need multiple tools or a professional background in animation. You need a clear process. Here it is.
Step 1: Create a Main Character
The main character is the load-bearing wall of your entire story. Every scene, conflict, and image generation will reference this character. Building her correctly at the start saves an enormous amount of rework later.
Appearance
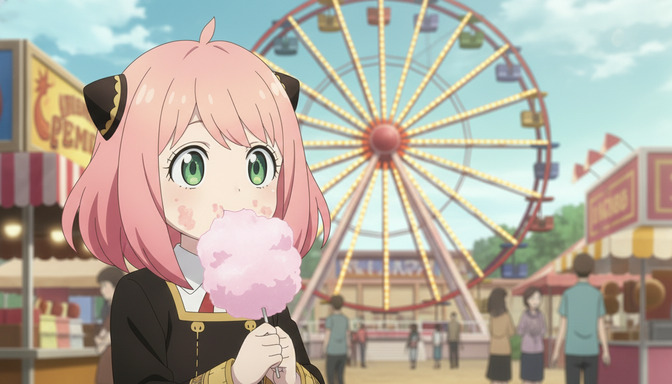
Be specific. "Pink hair" produces ten thousand possible characters. "Chin-length rose-pink hair with a slight natural curl at the ends, worn down with two small black cat-ear clips, bright green eyes with a wide iris and visible lower lash line, small round nose, a dusting of freckles across both cheeks" produces one. Name every distinguishing visual attribute: hair color, texture, length, and styling; eye color and shape; any scars, marks, or accessories; outfit silhouette, palette, and key details. This description becomes the core of every image prompt you write later.
Personality
Personality drives behavior, and behavior is what makes scenes feel alive rather than posed. Define your character in terms of how she acts under pressure, not just a list of traits. A character who is "brave and curious" is a placeholder. A character who "runs toward things that frighten her because standing still feels worse" is someone you can write a scene around. Give her a contradiction: brave but terrified of being seen as incompetent. Curious but deeply private about her own past.
Goals
A character without a goal has no reason to move through your story. Give her an external goal — the thing she is actively trying to accomplish — and an internal goal — the thing she actually needs, even if she cannot name it yet. External: win the regional cooking tournament before the school is shut down. Internal: prove to herself that she deserves to take up space in the room. The gap between external and internal goal is where most of your best scenes will live.
Backstory
The backstory does not need to be long. It needs to explain one thing: why she is the way she is. A single defining event or formative circumstance does more work than a detailed childhood history. She grew up as the only kid in the village who could hear the bells of the old shrine. Her older sister left without explanation three years ago, and she still looks for her in crowds. Her backstory does not have to be tragic. It has to be true to the person you built.
Step 2: Develop Supporting Characters
Supporting characters exist to pressure-test, illuminate, and complicate your main character. A protagonist surrounded by people who agree with her is a protagonist with no room to grow.
Allies
The best ally is someone who believes in your protagonist before she believes in herself — and who also has their own distinct goal that occasionally conflicts with hers. Build the ally's appearance with the same specificity you used for your main character. They will appear in shared scenes, and visual consistency across multiple characters requires that every character has a well-defined design from the start.
Rivals
A rival is not a villain. A rival is a character who wants the same thing your protagonist wants and is equally capable of getting it. The most effective rivals mirror the protagonist's greatest strength back at her in a context that makes it feel like a flaw. If your protagonist's strength is relentless determination, her rival might have the same quality — and demonstrate exactly how ugly that can look when unchecked.
Mentors
The mentor's job is to give your protagonist the tool she needs for the climax, then step back and let her use it alone. A mentor who solves the problem for the protagonist collapses the story. Design the mentor as someone with a visible flaw, a piece of unfinished business of their own — it makes them feel like a real person rather than a plot device.
Step 3: Create a Story Concept
The story concept is not a plot summary. It is the structural contract you make with your audience: this is the genre, this is what the story is really about, this is the shape of the conflict, and this is how the protagonist will change.
Genre
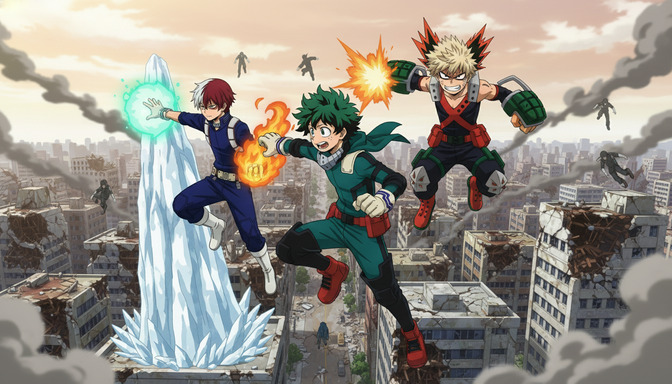
Genre sets expectations and visual vocabulary. A slice-of-life story calls for soft afternoon lighting, domestic interiors, and quiet emotional beats. A shonen action story calls for dynamic poses, high-contrast environments, and kinetic energy in every frame. You can blend genres — a sports shonen with romance subplot, a mystery with isekai elements — but you need a primary genre to anchor your visual and narrative choices. AutoWeeb's style modes map directly to genre: your art style selection should match the genre you have chosen.
Themes
Theme is what the story is asking. Not what happens, but what the events mean. "What does it cost to protect someone you love?" is a theme. "Friendship is important" is not — it is a conclusion, not a question. A theme built as a question keeps the story open and generative. Your scenes will naturally find ways to explore it if you keep the question active.
Conflict
Every scene needs a conflict, and your story needs a central conflict that all the smaller ones feed into. The central conflict should directly oppose your protagonist's external goal while forcing her to confront her internal goal. If her external goal is to win the cooking tournament, the central conflict might be discovering that the tournament is rigged — and the internal conflict that surfaces is whether she is willing to fight for something even when the system is against her.
Character Arc
The character arc is the distance between who your protagonist is at the start and who she becomes by the end. The best arcs have a specific transformation that the audience can trace scene by scene: she begins unable to ask for help, and by the climax she asks for it at exactly the right moment. Define the starting point and the ending point, and your story structure will almost write itself.
Step 4: Write a Script
A script for AI anime production is a hybrid document: it contains narrative beats for storytelling and visual specifications for generation. Each scene description should be specific enough to become an image prompt without much additional work.
Opening scene
The opening scene establishes the world and the protagonist's ordinary life before anything disrupts it. It should contain one strong visual hook — a specific image that tells us something essential about who she is and where she lives. Keep the opening tight. Three to four shots is enough to ground the audience before the story begins to move.
Inciting incident
The inciting incident is the moment that makes the story necessary. Something changes, and your protagonist cannot ignore it. The strongest inciting incidents feel both surprising and inevitable in retrospect. Write it as a specific visual event: not "she gets bad news" but "she finds an envelope under her classroom door with her sister's handwriting on it, three years after her sister disappeared."
Rising action
Rising action is a series of escalating obstacles, each one harder than the last, each one revealing something new about your protagonist's character. For AI production, this is usually three to five scenes, each with a distinct visual setting and emotional tone. Vary the environments so your generated images have contrast: interior versus exterior, day versus night, tight versus wide shots.
Climax
The climax is the scene where everything is decided. Your protagonist faces the central conflict directly, using everything she has learned, and the outcome depends entirely on who she has become. The climax scene is often the most visually demanding to generate well: it needs strong composition, specific lighting, and clear emotional direction. Write it with the same care you would bring to an image prompt.
Resolution
The resolution shows the new normal. It does not need to wrap everything neatly. It needs to show that the protagonist has changed and that the change is real. One or two scenes is usually enough. The final image of your resolution should echo the opening image in a way that shows how far she has traveled.
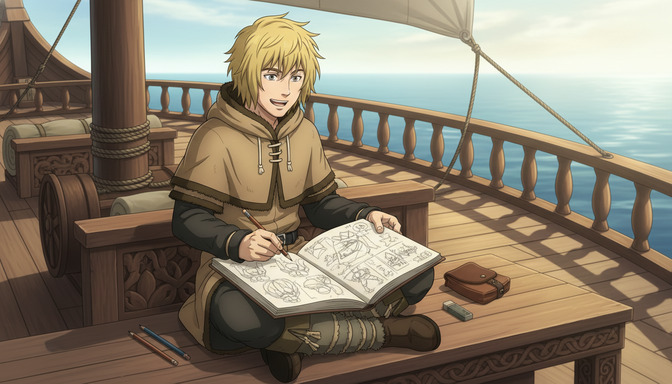
Step 5: Build a Storyboard
A storyboard converts your script into a visual plan. It is the document that bridges writing and generation — it tells you exactly what to generate and in what order before you spend a single credit.
Scenes
Break your script into discrete scenes, each with a single dominant emotional note. Number them. Each scene is a generation target: one scene equals one or more image or video generations. A 10-scene story is a 10-generation production plan, not an open-ended generation session.
Shots
Within each scene, define the shots: which moment in the scene gets its own image or video clip? A conversation scene might have three shots: a wide two-shot to establish the space, a medium close-up on the protagonist's face during her key line, and a reaction shot on the ally. Planning shots before generating means every output has a purpose in the sequence.
Camera angles
Camera angle communicates emotion as reliably as any line of dialogue. Low-angle shots read as powerful, dominant, or threatening. High-angle shots read as small, vulnerable, or observed. Eye-level shots are neutral and relational. Dutch angles (tilted) signal instability or wrongness. Overhead shots create a sense of being watched or judged. Assign a camera angle to each shot in your storyboard before you write the generation prompt. The angle is the first word of the prompt.
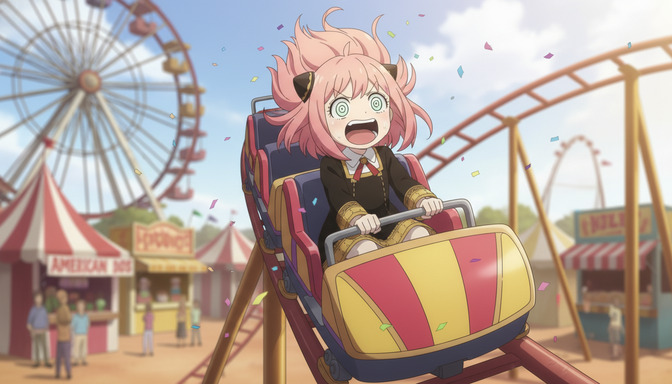
Character actions
For each shot, specify what the character is doing physically. Not "she looks sad" but "she stands with her back to the room, both hands on the windowsill, forehead nearly touching the glass, rain on the other side." Physical action carries emotional weight in AI image generation in a way that adjectives alone cannot. Every character action in your storyboard becomes a piece of prompt language.
Step 6: Generate Images
With your storyboard complete, image generation becomes a structured production process rather than an open-ended creative session. You know what you need. You know what order you need it in. The prompts are 80% written already.
Character sheets
Generate your character sheets first, before any scene artwork. A character sheet is a neutral-background reference image of your character in a clear front-facing or three-quarter pose, with all distinguishing features visible. This image becomes the reference for every scene generation that follows. In AutoWeeb, you can save the character and use it as a visual anchor across all subsequent generations. The guide on creating multi-character anime scenes using character sheets covers this in detail.
Prompt structure for a character sheet: character design sheet, front-facing portrait, anime art style — [character name], [age], [hair color, texture, length, styling], [eye color and shape], [any distinguishing marks], [outfit description with silhouette, colors, and key details] — neutral grey studio background, clean even lighting, no motion blur, no background elements
Backgrounds
Generate your environment backgrounds as separate images. A background generated without a character in it gives you a clean canvas you can reuse across multiple scenes, and it gives you more control over the setting independently of the character. For each distinct location in your storyboard, generate at least one establishing background image. Use the time of day, weather, and lighting direction you specified in the storyboard.
Scene artwork
With character references and background references in hand, generate your scene artwork by combining character description, environment, camera angle, lighting, and character action from your storyboard. Use your saved character reference image alongside your text prompt to anchor identity across scenes. For more on keeping characters visually consistent across a multi-scene project, the guide on maintaining character consistency in Seedance 2.0 videos is the place to start.
Step 7: Generate Videos
AI anime video generation turns your static scene artwork into animated clips. The quality of every video begins with the quality of the source image — a well-composed, well-lit image with clear character action generates far better video than a vague or compositionally weak one.
Scene animation
For each scene clip, upload the source image and write a video prompt that specifies what changes from the static frame: what moves, in what direction, at what pace, and for how long. Keep the motion intentional and minimal, especially for emotionally quiet scenes. Restless motion in a tender moment destroys the mood. Save the dynamic motion for action and climax sequences.
Camera movement
Camera movement is a storytelling tool. A slow push-in builds intimacy and tension. A pan across a crowd establishes scale. A static hold during a confession lets the performance breathe. Assign camera movement to each video clip in your storyboard just as you assigned camera angles to each still shot. The language for video prompts: slow push-in from medium to close-up, wide pan left to right, steady pace, 5 seconds, camera static, no movement, hold on medium shot. For the full framework, the guide on turning an anime image into a video with AI covers camera movement language in depth.
Character motion
Specify clothing physics, hair behavior, and body movement as discrete elements of your video prompt. Her hair lifts slightly as she turns, the ribbon at her collar shifting with the motion is more useful to the model than she moves naturally. For action sequences, name the physical action precisely: she raises one hand to shoulder height, palm open toward the approaching figure, fingers together. Precision in character motion direction produces motion that reads as intentional, not accidental.
How AutoWeeb brings the whole workflow together
The reason most anime creators are stuck generating images that never become a story is that they are using disconnected tools: one for character design, one for writing, another for image generation, another for video. The handoffs between tools are where continuity breaks down, credits get wasted, and momentum dies.
AutoWeeb is built as a single workflow. You create a character and save it. That character becomes the reference for every image generation in your project. Your storyboard lives in the same workspace as your generations. When you generate a video, you are working from the image you generated two steps earlier, with the character you built at the start. Nothing breaks. Nothing drifts.
The AI Prompt Agent handles the translation between your creative intent and the technical prompt language the model needs. You describe the scene; the agent structures it correctly — character first, environment second, lighting third, camera direction fourth. For video, it adds animation direction automatically. For character sheets, it expands a rough description into a full specification. The creative decisions stay yours. The structural work is handled.
The result is a production pipeline that a single creator can run from beginning to end: character, story, script, storyboard, images, video. The kind of complete animated story that previously required a team, a budget, and months of production time is now a workflow anyone can complete in an afternoon.
Frequently asked questions
Do I need to write a full script before generating images?
Not a full professional screenplay, but you do need a scene-level outline before you start generating. Without it, your images will be thematically disconnected and you will spend credits generating things you cannot use together. A scene list with a one-line description of each beat, the character action, and the visual setting is enough to start generating with intention.
How many characters should a first AI anime story have?
One protagonist and one to two supporting characters. More than three named characters in a short-form project means more character sheets to maintain, more consistency work across scenes, and more cognitive load in every prompt. Start with a small, tight cast. You can expand in future projects once you have the workflow down.
What is the best genre for a first AI anime story?
Slice-of-life is the most forgiving starting genre. Scenes are set in familiar, easily described locations — classrooms, cafes, parks, bedrooms. The emotional beats are grounded and relatable. The visual requirements are achievable without highly dynamic camera angles or complex action choreography. Once you have completed one slice-of-life story, the skills transfer directly to action, romance, fantasy, and every other genre.
How long does a complete AI anime story take to produce?
A short-form story — ten scenes, one to two shots per scene — takes most creators four to eight hours across the full workflow on their first project. Character creation and storyboarding take about a third of that time. Image generation and video generation take the rest. The more planning you do before you generate, the faster the production phase goes.
How do I keep my character looking the same across every scene?
Generate a complete character sheet first. Save that character in AutoWeeb. Use the saved character image as a visual reference alongside your text prompt in every scene generation. The combination of a detailed text description and a reference image gives the model two anchors for visual identity simultaneously, which dramatically reduces drift between scenes. The guide on writing better AI anime image prompts for consistent results covers the technical side of this in depth.
Can I use AutoWeeb to generate the script itself?
Yes. AutoWeeb's story tools can generate scene outlines and script beats from a brief premise and character description. The process works best when you provide clear character identities, a defined genre, and a central conflict — the more specific your input, the more usable the generated story structure. Treat the generated output as a starting draft, not a final document. Your creative judgment shapes it into something that feels genuinely yours.
What makes an AI anime story feel cohesive rather than random?
Three things: consistent characters, consistent visual world, and a clear emotional throughline. Consistent characters come from strong character sheets used as references throughout. A consistent visual world comes from generating backgrounds and environments before scene artwork, so every scene shares the same lighting logic and architectural palette. The emotional throughline comes from the script: if every scene has a clear place in the story structure, the generated images will feel like they belong together even before any editing.
Is this workflow useful for someone who has never made animation before?
It is designed for exactly that person. The workflow does not require knowledge of animation software, frame rates, or traditional storyboarding technique. It requires storytelling instincts — which most people who love anime already have — and a systematic approach to translating those instincts into prompts and visual specifications. The process itself teaches you what you need to know as you go.
If you are ready to generate your first scene images with the detail they need to work across a full project, the guide on writing better AI anime prompts and stopping wasted credits covers the complete prompt anatomy. And if video is where you want to end up, the guide on creating cinematic AI anime videos that look professional goes deep on everything that separates a polished animated scene from a rough AI clip.
Related Blog Posts
How to Use Poses to Make Your AI Anime Characters Feel Alive
A character standing still in every scene is not a character. It is a placeholder. Posing is what turns a design into a person.
Learn how to use poses in AI anime art to express emotion, drive action, and tell stories. Covers body language, action poses, romantic poses, group compositions, camera angles, and common mistakes.
5 Signs Your AI Anime Image Is Ready to Turn Into Video
Not every image that looks good as a still will animate cleanly. Here is what to check before you run it through your image-to-video model.
Learn the 5 signs that your AI anime image is ready for video generation. Check character consistency, clean anatomy, visible hands, facial expressions, composition, and background quality before animating.
How to Create Multi-Character Anime Scenes Using Character Sheets
Character sheets are the difference between a cast that stays consistent across every scene and characters that look like strangers to each other.
Learn how to use character sheets to generate consistent multi-character anime scenes with AI. Covers reference images, character descriptions, group shots, and common mistakes.
How to Write Better AI Anime Image Prompts for Consistent Results
The gap between a vague output and a character that looks the same every time almost always lives in how the prompt was written.
Learn how to write AI anime image prompts that get consistent results. Character descriptions, lighting, camera angles, art styles, and before-and-after examples for beginners.
Explore AutoWeeb
Jump into the tool that fits your creative step.
AI Anime Video Generator
Animate storyboard shots into cinematic clips with Seedance 2 and consistent characters.
Anime Character Creator
Design original characters with consistent sheets across every scene.
AI Anime Image Generator
Generate cinematic anime stills anchored to your character library.
Turn Photo Into Anime
Upload any photo and watch AI turn it into stunning anime art in seconds.
AI Anime Location Generator
Create a location set once, then generate reference images from every angle.
AI Anime Storyboarding
Describe your idea, pick your characters, and let AI draft the script and scenes.
AI Anime Prompt Agent
Turn a rough idea into a cinematic Seedance 2 prompt with the AI Director.